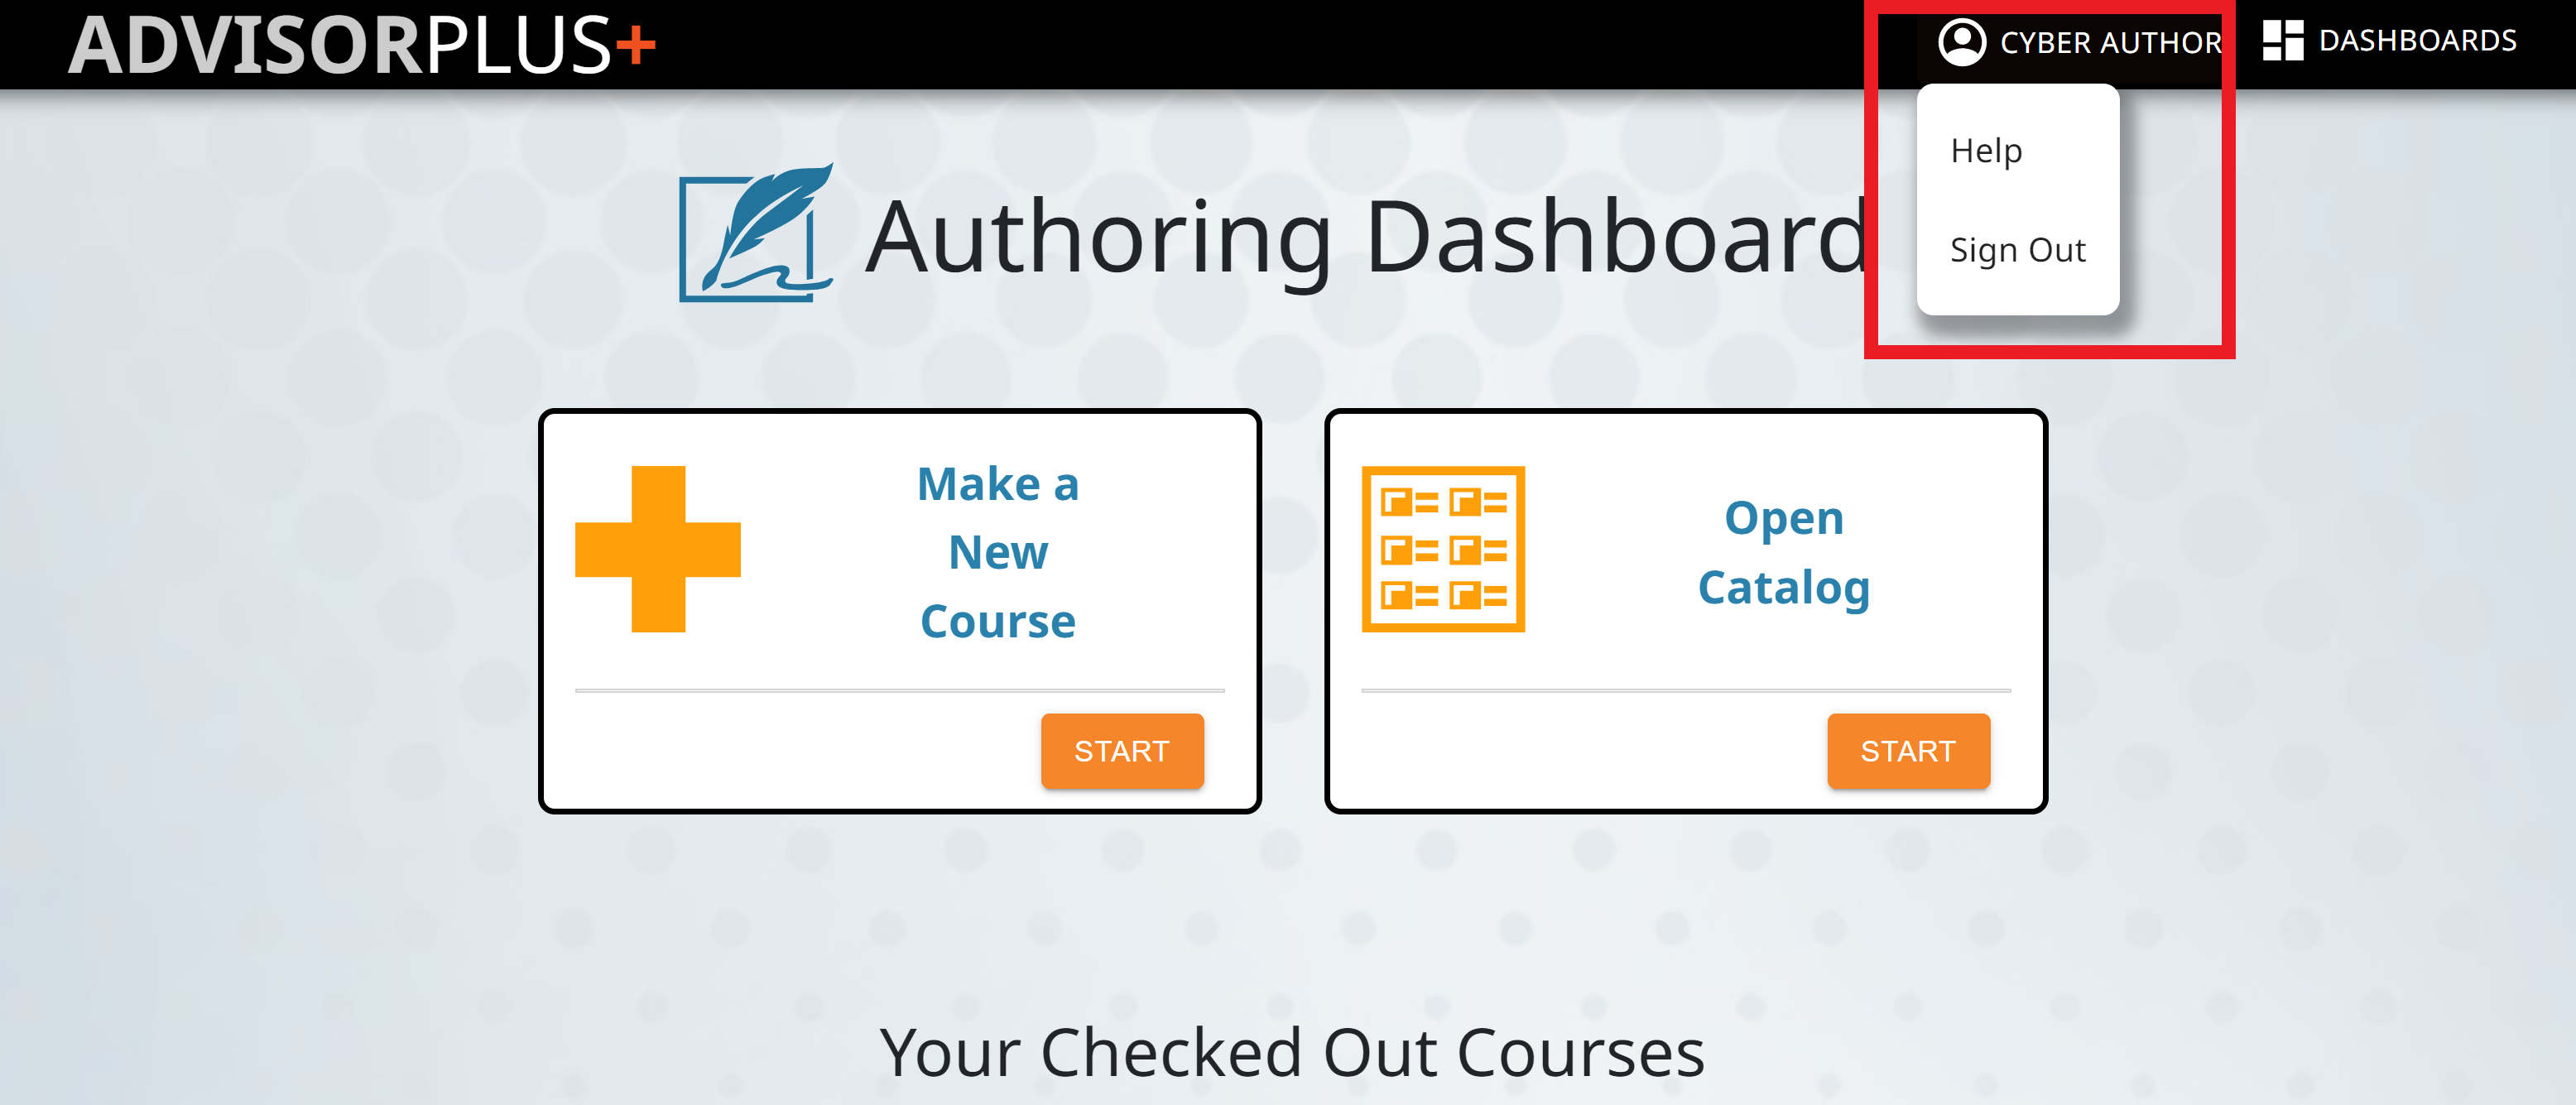
Easily access different areas of Advisor Plus from the main dashboard.

Authoring in Advisor Plus+
Your complete guide to start authoring in advisor plus
Introduction to Advisor Plus
Authoring+ is the authoring component of the Advisor Plus suite, alongside Admin+ for administrators, and Advisor Plus for learners. This User Manual provides a detailed, user-friendly guide to all essential components of Authoring+. Read the manual from start to finish or jump to specific areas of interest using the buttons or Table of Contents below.
Advisor Plus courses have a consistent, natural structure, making learning fun and engaging. Courses are divided into study modes, each with a different focus. Advisor Plus includes the intuitive study mode, Guide Me, which takes learners through the course in bite-size pieces.
The following practice study modes are also available for self-guided learning:
- Knowledge Room – Non-graded informational material including source material, study notes, and videos.
- Check Yourself – Self-graded questions in a flashcard style format.
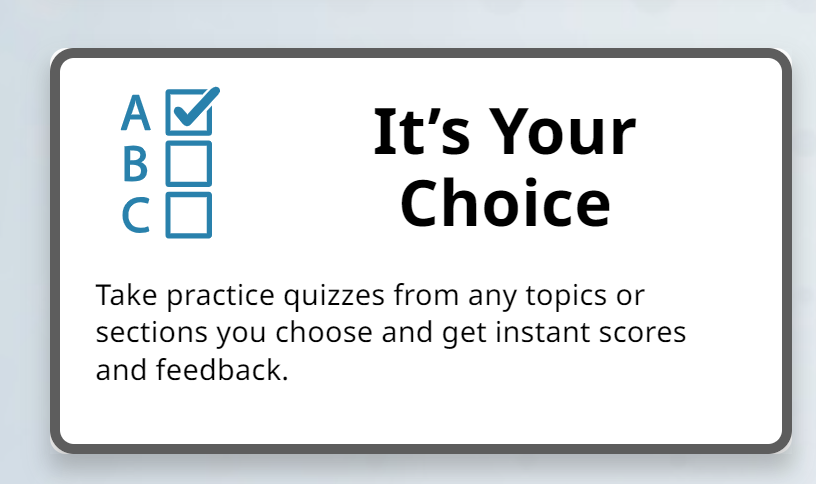
- It’s Your Choice – Auto-graded custom quizzes, built from areas of the course selected by the learner.
- Test Me Now – Mock exams that test learner comprehension. Content here includes only auto-graded study item types.
Table of Contents
- Main Dashboard
- Authoring Dashboard
- Create New Course Wizard
- Course Catalog
- Authoring Area
- Main Writing Screen
- Publish Course Wizard
- Additional Help
The dashboard screen provides individualized access to different areas of Advisor Plus. Admin and Authoring+ areas are only available to users with appropriate permissions.
- Admin+ – Manage user’s, course enrollments and make courses available to learners.
- Authoring+ – To author courses and publish courses.
- My Courses – Launches Advisor Plus, with access to all of the user’s course enrollments.

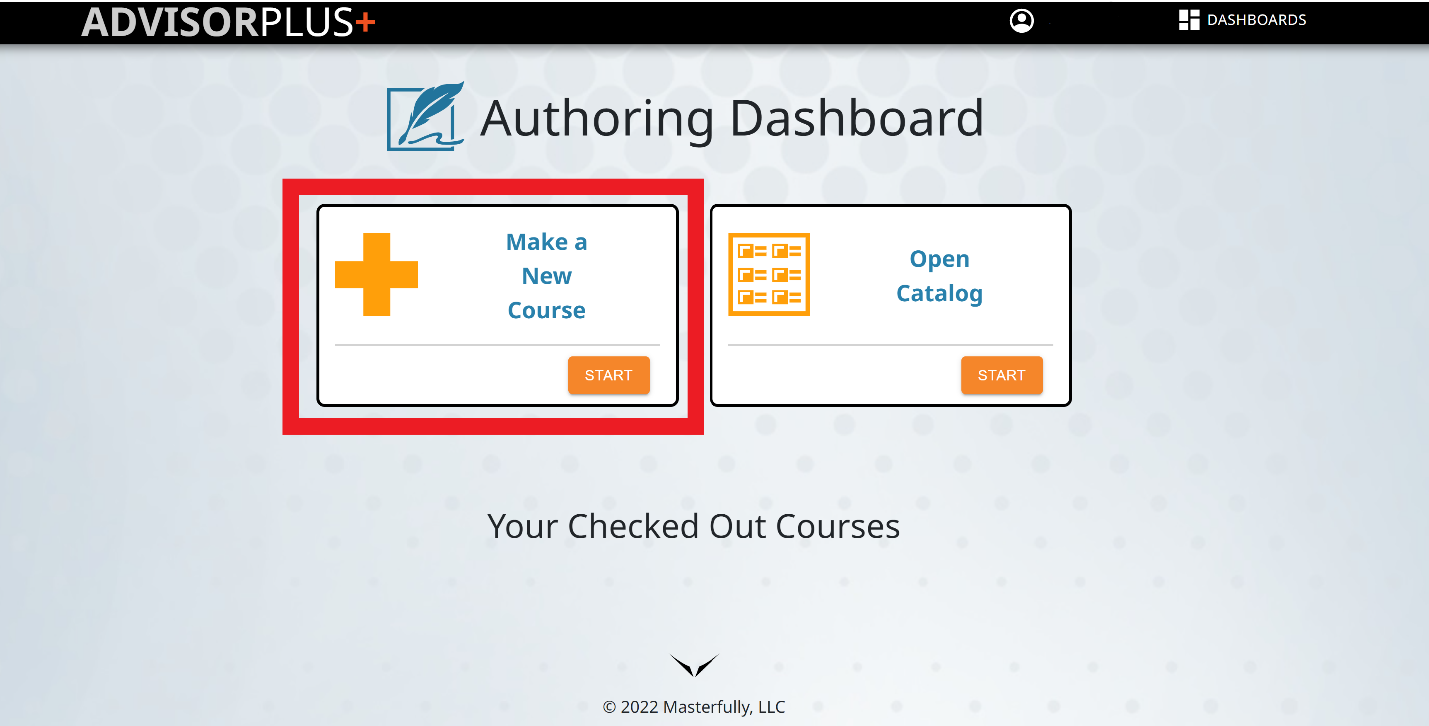
Take action in the Authoring Dashboard, where you can make a new course or view the course catalog.
The dashboard screen provides access to the most common tasks in Authoring+.
- Make a New Course – Launches the Course Creation Wizard to create a new course.
- Open Catalog – Opens the Authoring Course Catalog, showing all pre-published and published courses in your organization’s subdomain.
- Your Checked Out Courses – Displays courses currently checked out to you. If this is your first time in the Authoring+ Dashboard, no courses will display in this area.

Return to the dashboard at any time, throughout Authoring+ by clicking the Advisor Plus+ icon on the top left, or by selecting Authoring from the drop-down menu under Dashboards.

If you have a course checked out, you can easily view Course Details or check the course back in by clicking on the info button on the course tile.
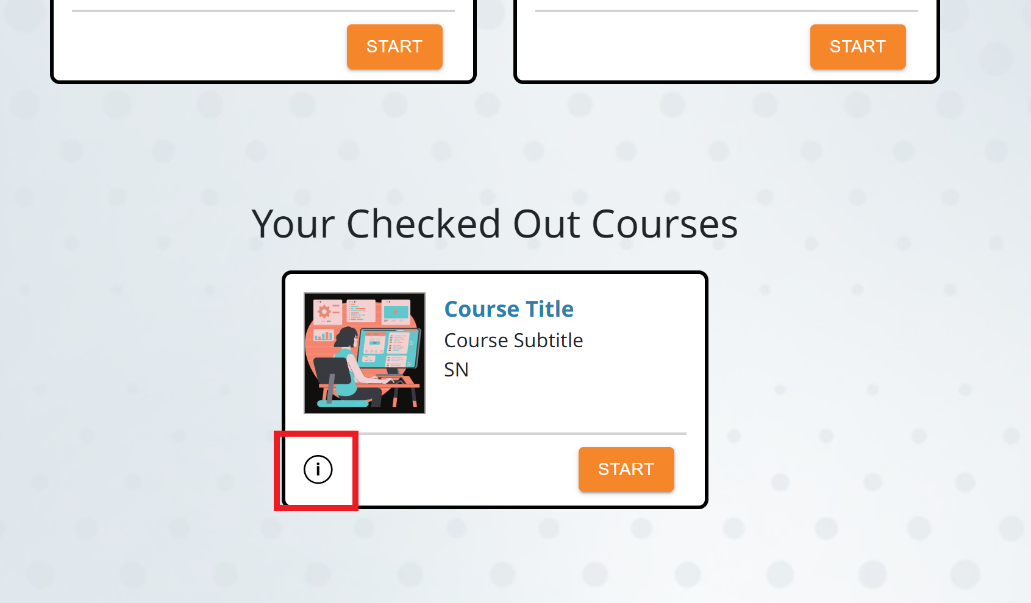
The course details sidebar provides the same information you’d find in the Course Catalog.
- Collaborators – Includes anyone who’s checked out the course.
- Course Check In – Checks in the course and removes it from your dashboard.
- Activity Log – Opens the activity log within the Course Catalog to view check ins, check outs and notes.

Creating a course is simple with our New Course Wizard. Start with just a title, or set up your course before you begin authoring.
The Create New Course Wizard guides you through the process of creating a new course. Simply follow the steps to create your course and begin using Authoring+.
In the Create New Course Wizard, you’ll encounter four main screens to build your course:
- Course Information – Identify your course by adding Course Title, Subtitle, Short Name and Author. Only Course Title is required. Upload a Course Graphic to associate with your course.
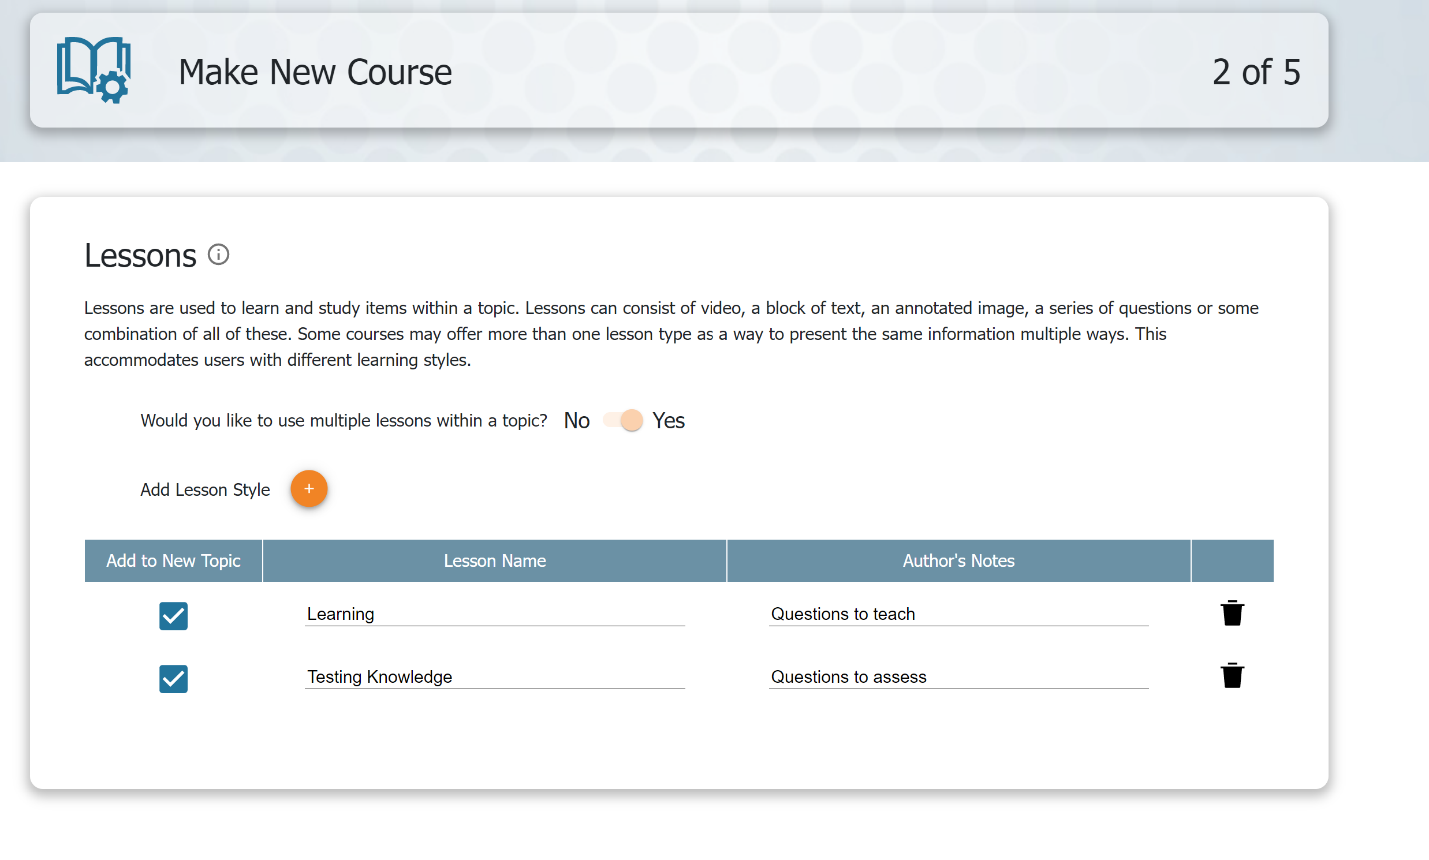
- Lessons – Identify and name course lessons.
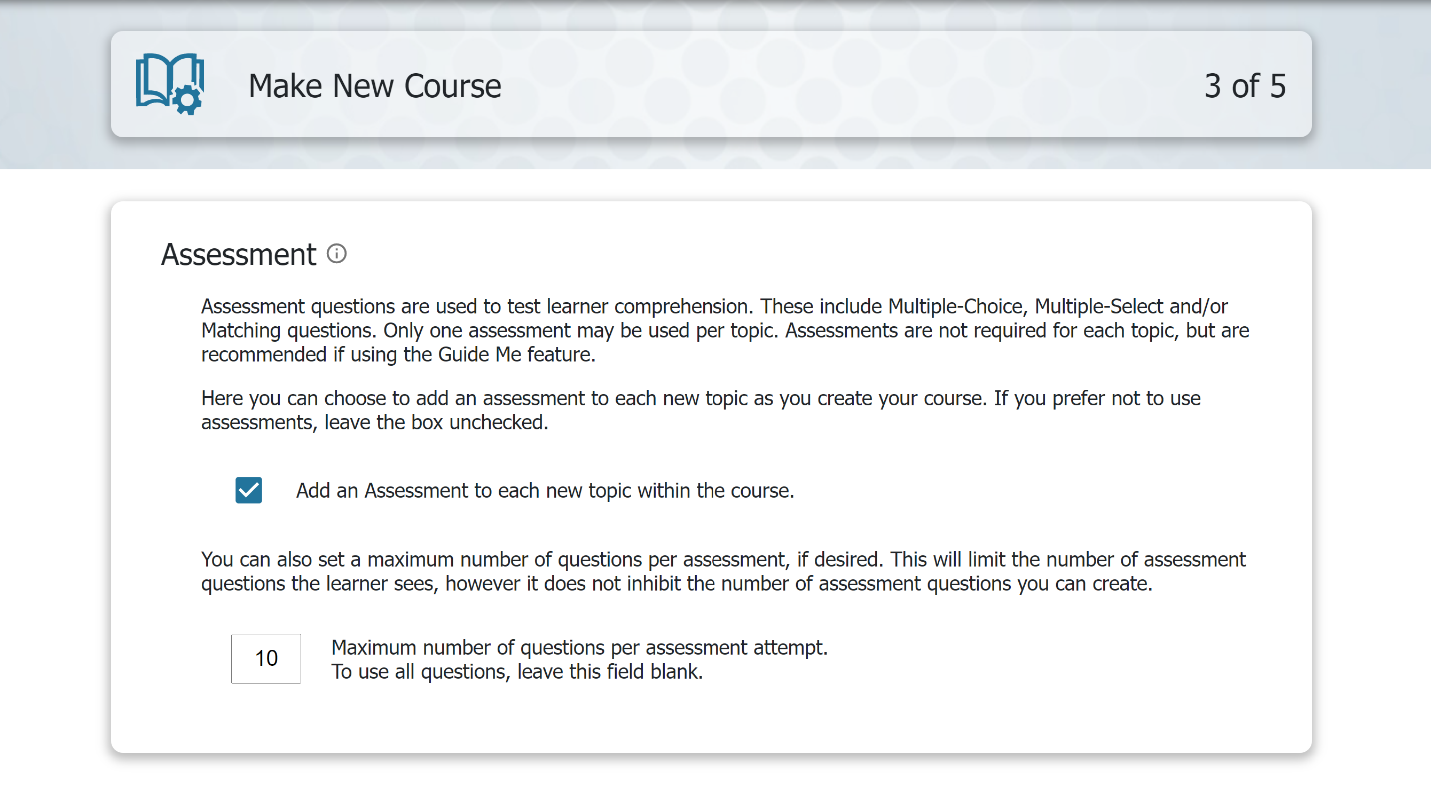
- Assessments – Choose whether or not to add an assessment to each new topic, and set the maximum number of questions per assessment attempt.
- Orientation Slides – Format the welcome slide and add additional slides.
Of all this information, only the Course Title on the Course Information page is required to create your course.
The Create New Course wizard is designed to get your course created quickly and easily, so you can focus on creating course content. However, if you have an idea of which lessons, assessments or orientation slides, you’d like to include in your course, the course wizard allows you to input this information as well, to save you time.
Each page of the Create New Course Wizard contains an information button to help guide you through the process and answer any questions you may have.
Access the Create New Course wizard at any time by clicking Make a New Course on the Authoring Dashboard Screen.
On this page, enter basic information about your course. This information can be changed at anytime within the Course Details page of Authoring+.

There is only one required field that must be completed to continue with course creation:
- Course Title – Name of the course.
Below the one required field, you’ll find three optional fields to identify your course further:
- Subtitle – A short description of the course. Learners will see the subtitle displayed directly under the course Title on their My Courses page of Advisor Plus.
- Short Name – A short, letter or number abbreviation to quickly identify the course.
- Author – Identifies who is responsible for producing the course. This can be one or more persons, a company or other organization, etc.
Lessons are used to learn and study items within a topic. All study item types are available to use in the lessons area. You can choose to identify your lessons now, or add them later in the Course Editor.
If you choose to use multiple lessons in your course, you can choose to automatically add each lesson to newly created modules. This is a helpful way to organize information in different ways for the learner.
Alternatively, you can choose not to use multiple lessons within a topic. If you choose this option, one lesson will be added to each module as default.
Assessments are used to test learner comprehension on a topic. You have the option to set a limit for how many questions are included in an assessment attempt. Additionally, you can choose whether to automatically add an assessment to each new topic within your course, or add them on a case-by-case basis.
Assessments are recommended for use in the Guide Me study mode.
Assessments consist only of Auto-Graded question types: Multiple-Choice; Multiple-Select and/or Matching questions.
This page simply shows previous selections for confirmation. Clicking Start will create the course using this information, and take you into the Main Writing Screen.

Find all courses, including published and in progress, in the Authoring Course Catalog
The Course Catalog displays all courses authored in your organization. Access the Course Catalog by clicking the Course Catalog tile from the Authoring+ Dashboard.

The Authoring Course Catalog contains two main areas:
- Stat Bar – Displays Authoring+ statistics for your organization, including number of published courses and total number of courses
- Course List – The full list of courses available within Authoring+

There are many ways to navigate around the Course Catalog. For example, you can click within the Stats Bar to view courses with specific status.
Or, you can search for a specific course title or author name using the search bar. Use the status drop down to sort courses by status.
On the main course catalog page, you see the information for all courses at a glance, including:
- Course Title
- Author – As entered upon course creation
- Status – Prepublished, published or unpublished
- Prepublished – A course that has not yet been published
- Published – A published course
- Unpublished – A course that was previously published but has since been withdrawn
- Checked Out – To whom the course is checked out, if anyone
- Date Checked Out – The date the last collaborator checked the course out
To view more details for any course, click on the course title.
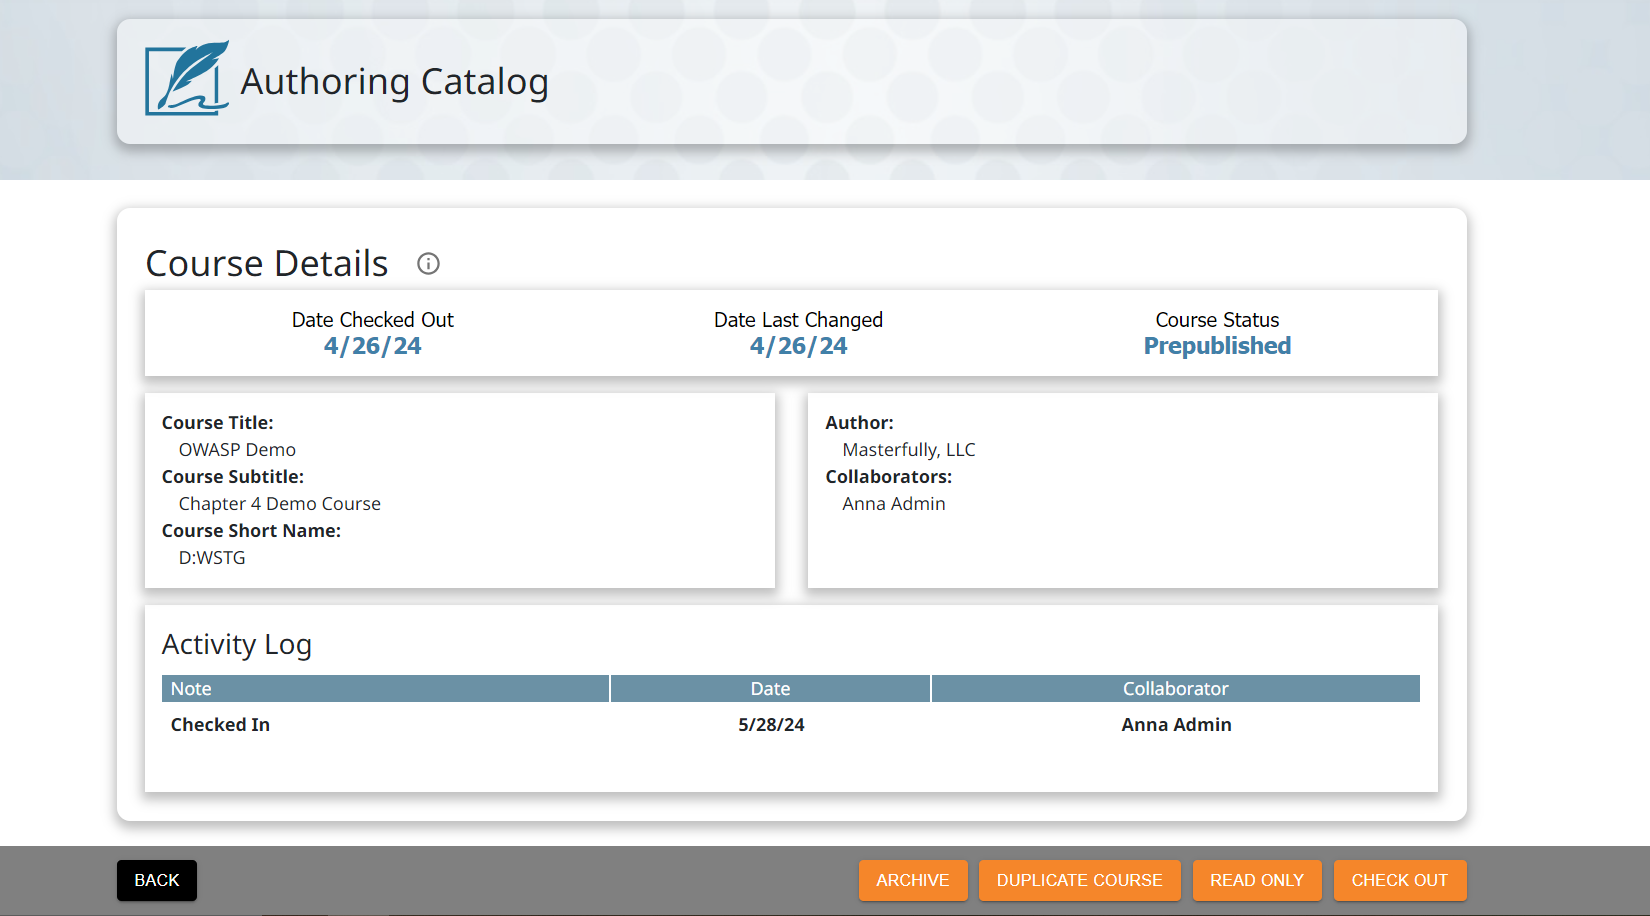
The Course Catalog Detail page provides an in-depth look at any course, whether or not you have the course checked out.
In addition to Course Title, Author, etc. you can view the course’s Activity Log, that shows which user’s have checked the course out, when the course was checked out, and course check in notes.
You can also perform course check in or check out from this page. You can find detailed information about Duplicate Course and Read Only modes below.
Duplicate Course
Click the Duplicate Course button to duplicate the course. This course will be duplicated into a pre-published state. It will not affect the original course or enrollments in any way. All course content will be duplicated into a new course.
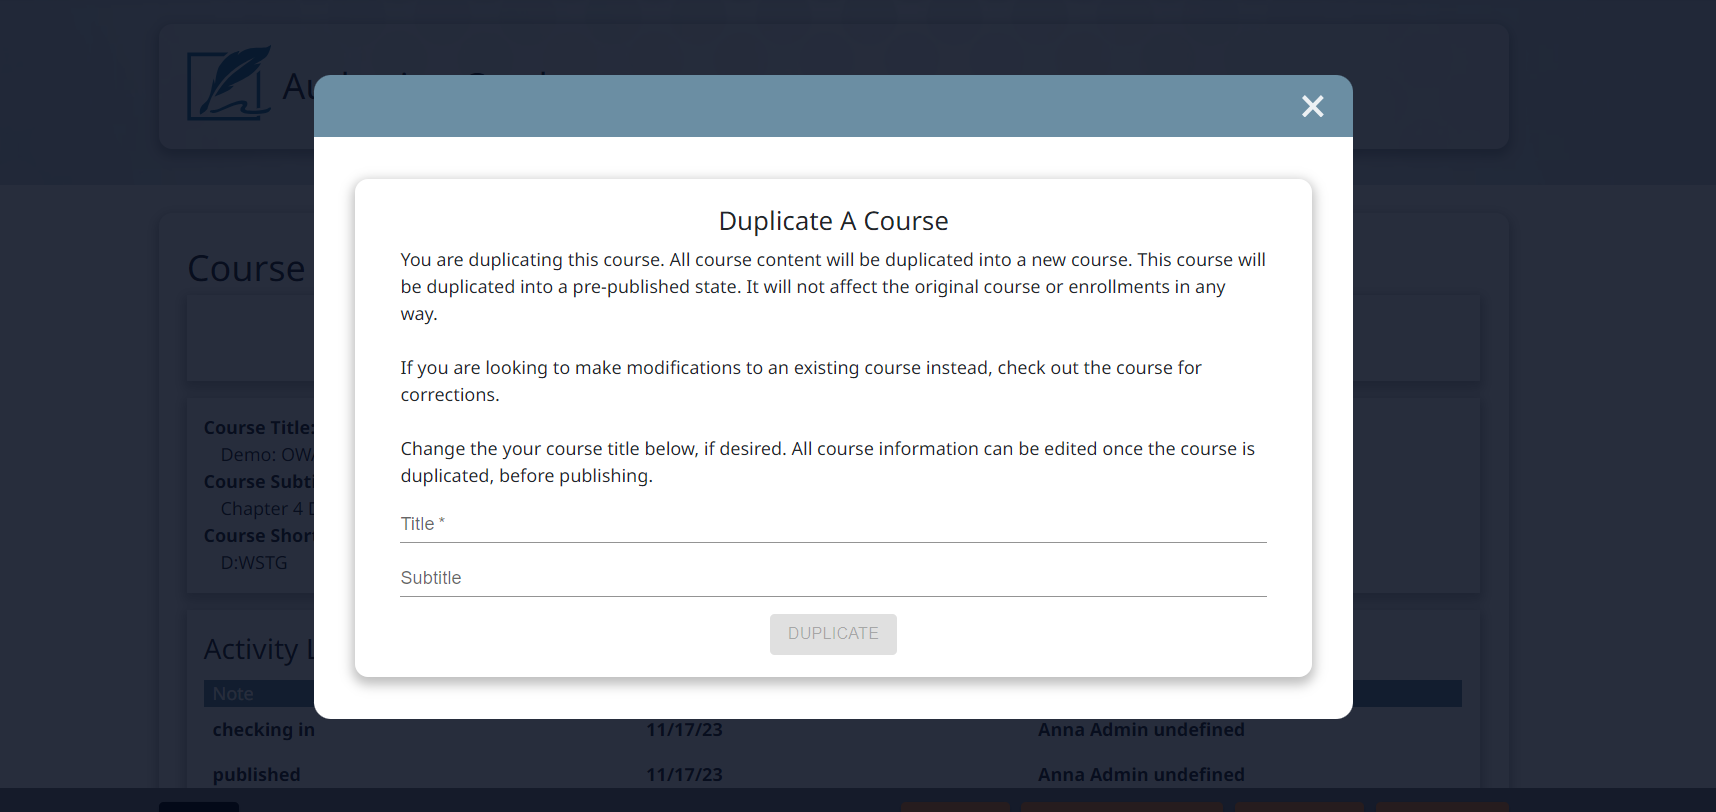
If you are looking to make modifications to an existing course instead, check out the course for corrections. Change your course title below, if desired. All course information can be edited once the course is duplicated, before publishing.
Read-Only Mode
Access the Read-Only mode from the Course Catalog Detail page. In Read-Only mode, you can view any in-progress course without checking it out. All editing functionality is disabled, making it ideal for showcasing progress on course content without affecting the author’s work. Additionally you can enter Preview Mode from Read-Only mode to seamlessly see what the course will look like to learners.
You’ll spend the majority of your time in the Authoring area, where you can change course metadata, set up the Table of Contents, and of course, author your course.
This screen is where all course editing takes place. You will spend most of your time here for course creation. The Authoring Area includes:
- Header bar indicating the course title and total study item count.
- A collapsible left pane containing the table of contents structure for the course.
- A right pane that will display different screens depending on where in the Editor you are.
Collapse the left pane with the carrot at the top to allow more working room on the right.
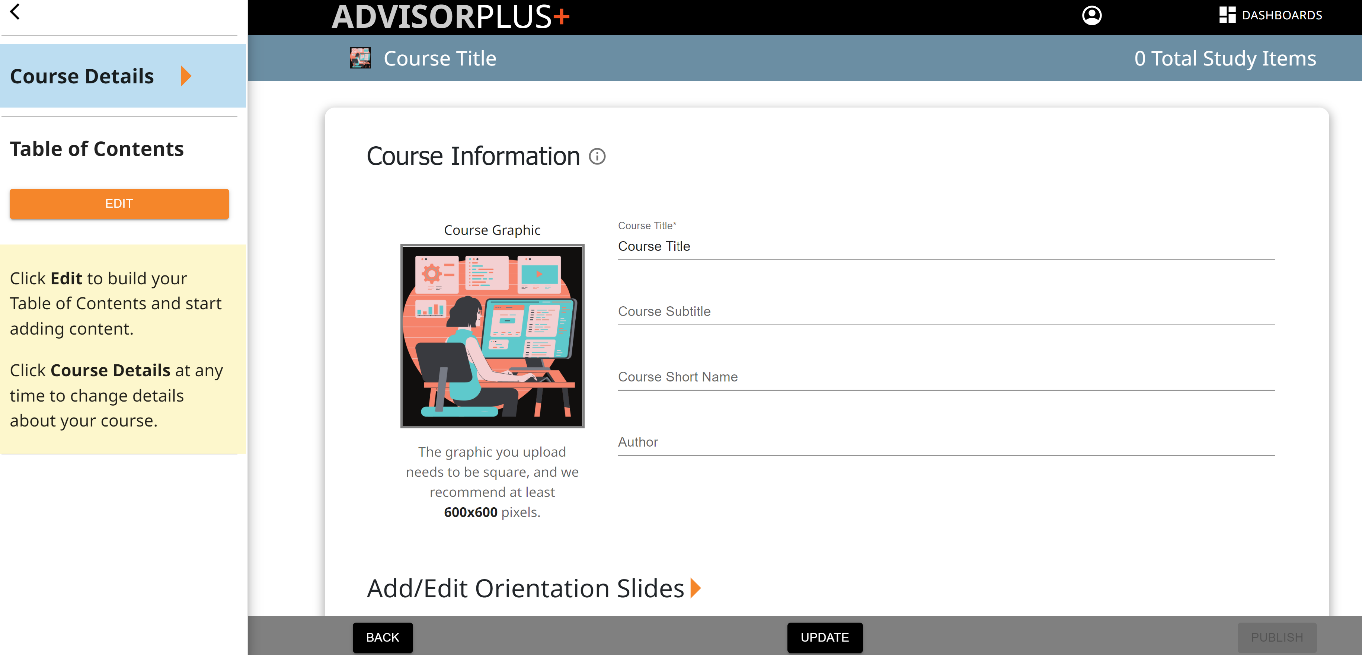
Upon initial creation of a course, the left pane that displays the course Table of Contents will appear rather bare. To get started, click Edit on the left pane to build your table of contents.
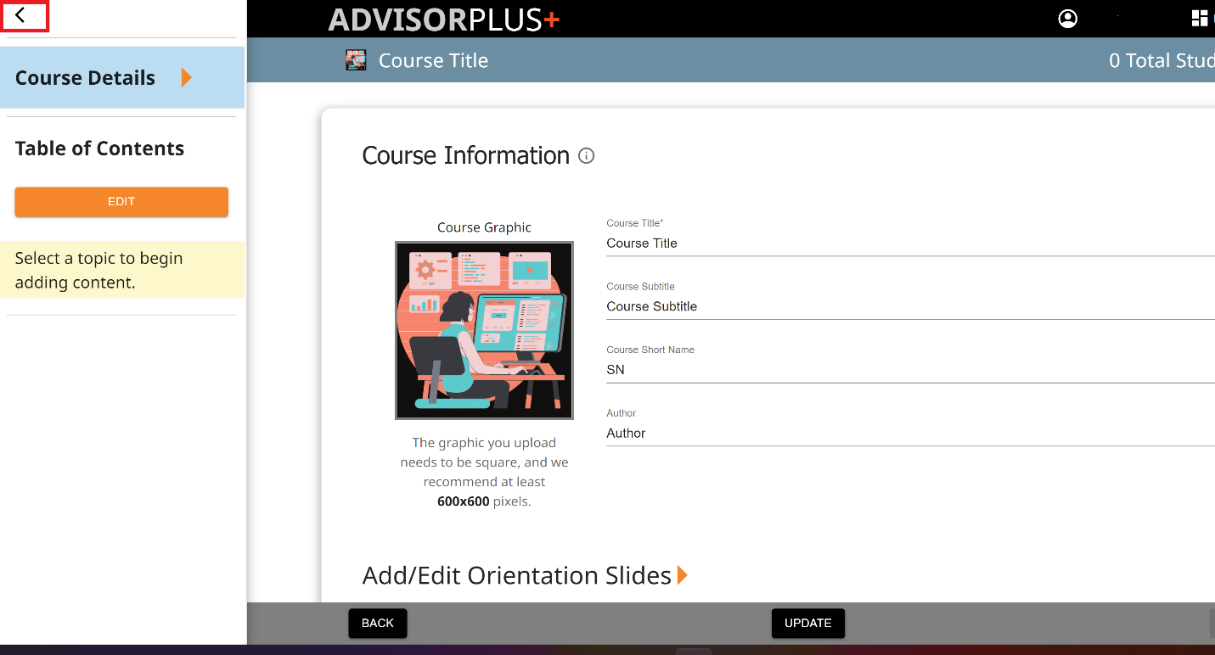
To view and edit course information editor, select the Course Details page from the left pane. This is the page you’ll see when you first enter into a course. Here, you’ll see all the same fields presented in the Create New Course wizard.
Change course metadata, add/edit orientation slides or make adjustments to lesson and assessment settings.
Once you’re done making changes to Course Details, click the Update button in the middle of the bottom action bar to save changes.

To begin building your course, use the Table of Contents Editor. Access this editor at any time by clicking the Edit button on the left pane. Authors may change the table of contents at any time throughout course creation, including changing titles, additions and deletions.

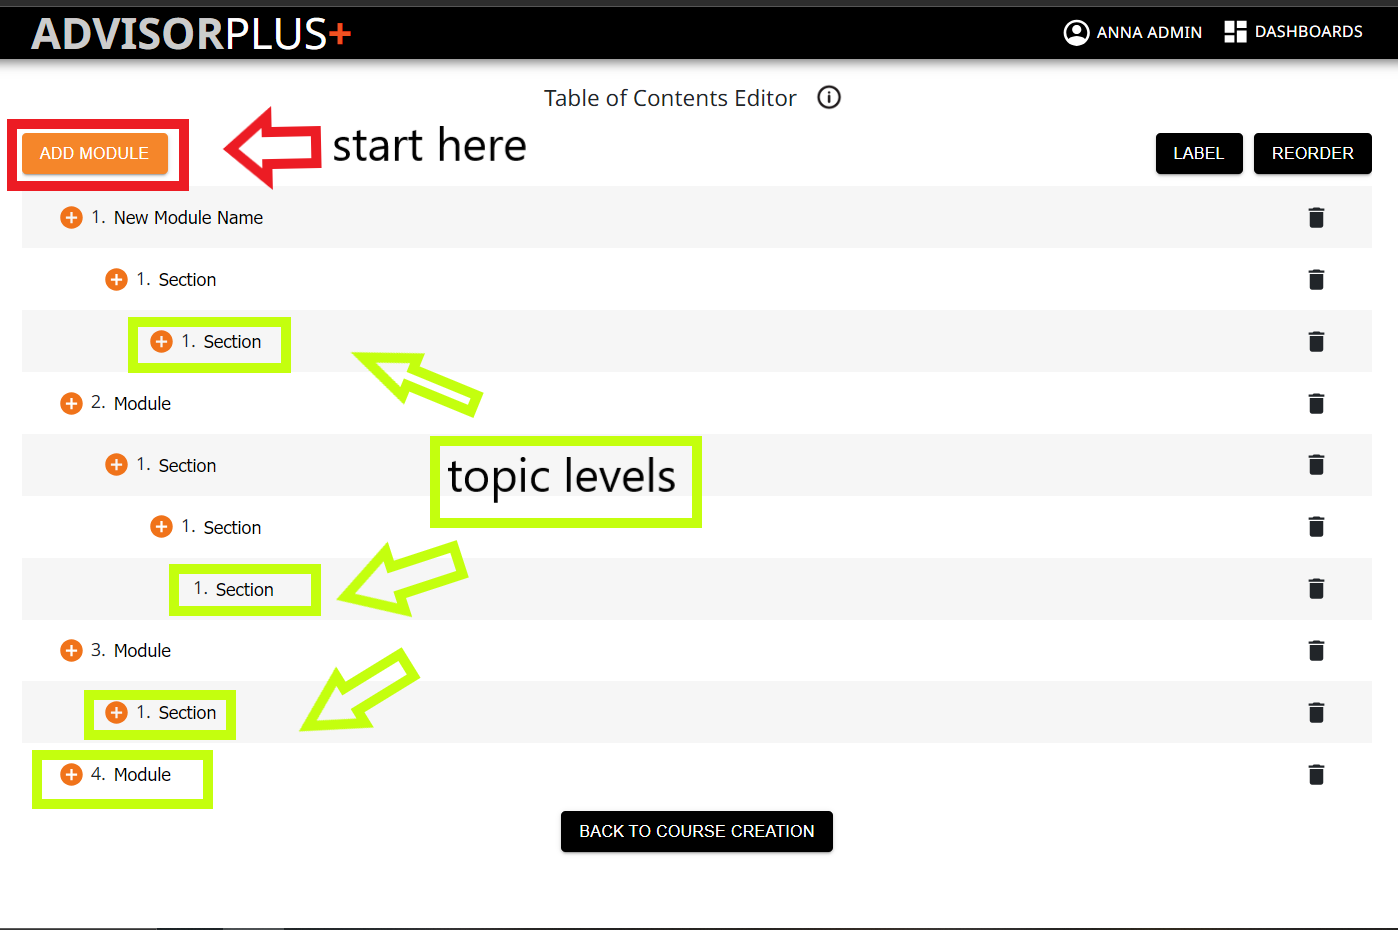
The Table of Contents Editor provides four buttons:
- Add Module – Create a new module level.
- Label– Opens a popup with options on how to alpha-numerically sort the modules and sections of your course.
- Reorder – Activates drag-and-drop functionality to reorder modules and sections within the Table of Contents.
- Back to Course Creation – Takes you back to Course Creation and the Main Writing Screen
Use the info button next to the page title to answer any other questions you may have about building a Table of Contents.
Create the Table of Contents
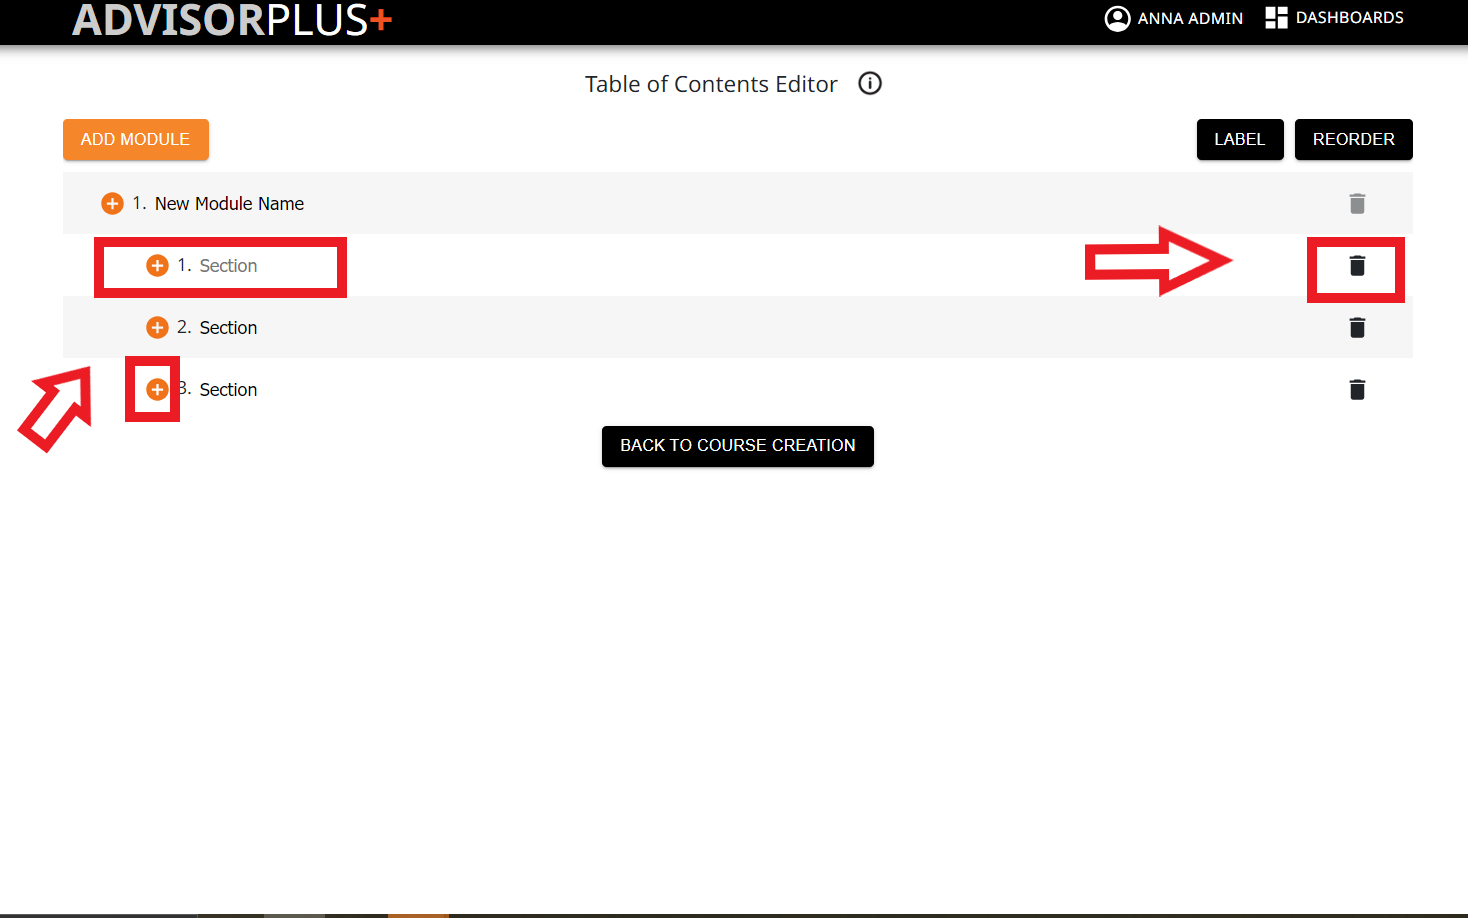
Begin creating your table of contents with modules and sections. Add a module by pressing the Add Module button. Click the plus symbol to add sections beneath the Module level. You can then nest multiple levels to create a structured table of contents. Keep in mind that content will only be shown at the topic level, that is the lowest level of the Module structure. Topic levels below are shown with a red rectangle.
Name Sections
Rename Modules and Sections by clicking on the text. To remove a Module or section, click the trash can icon on the right. Be advised, if you delete a Module, it will delete all children sections, including their study items, beneath it as well.
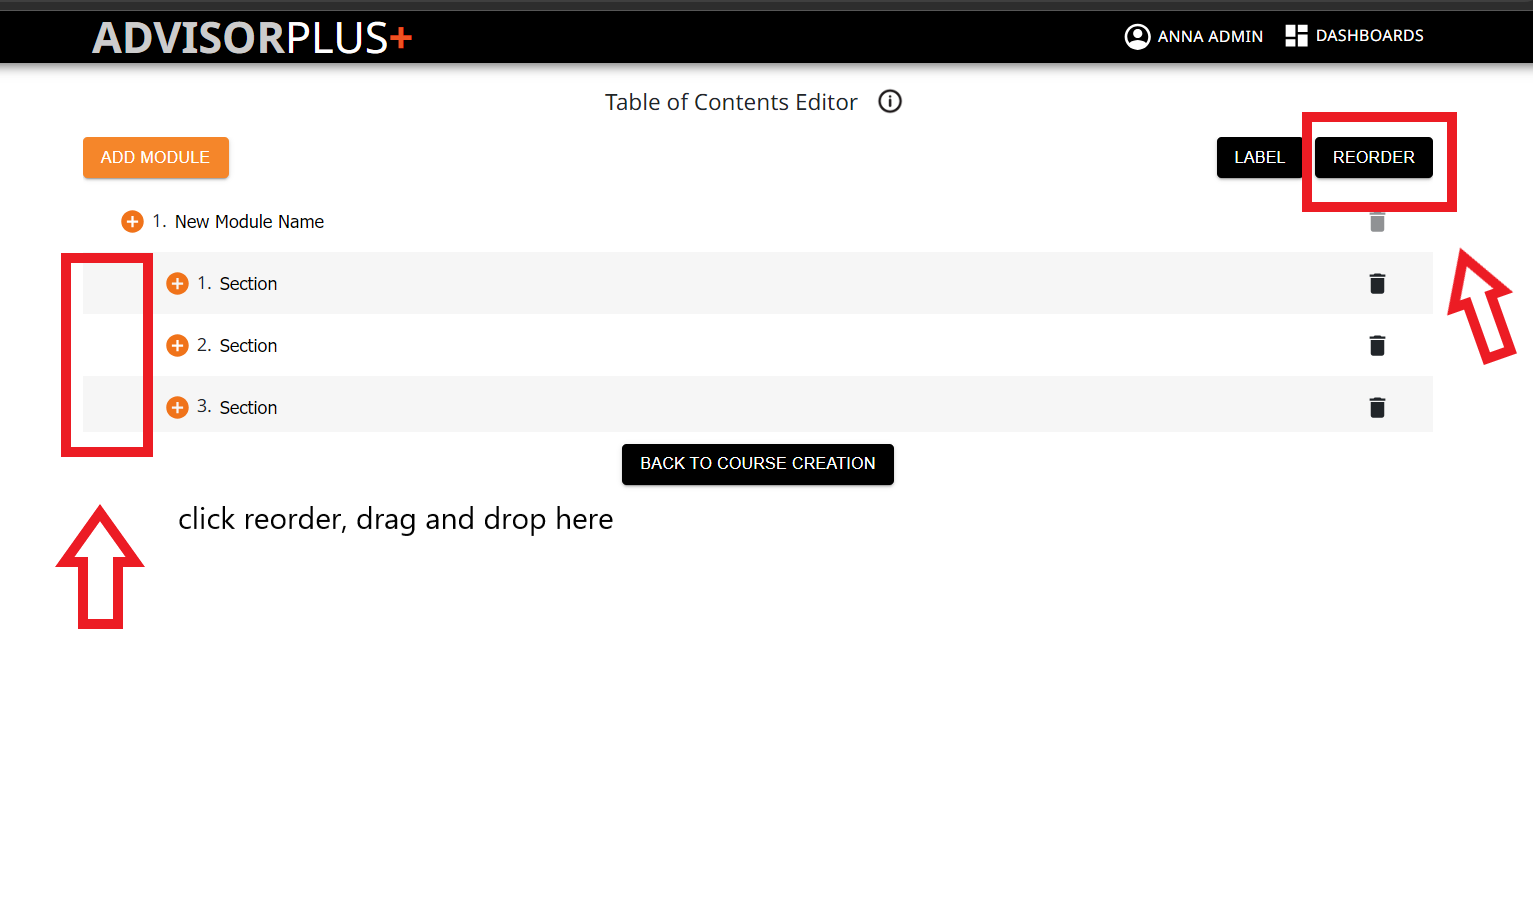
Reorder Sections
To reorder sections, click Reorder to initiate drag-and-drop functionality. Pressing Reorder will activate drag-and-drop, turning the plus signs into hamburger icons.
To reorder, click on the hamburger icon of the section you wish to move, and drag it to it’s desired position. Be advised that if you move a parent with children, the children will move also. Once you’re done, click Done to deactivate drag-and-drop.
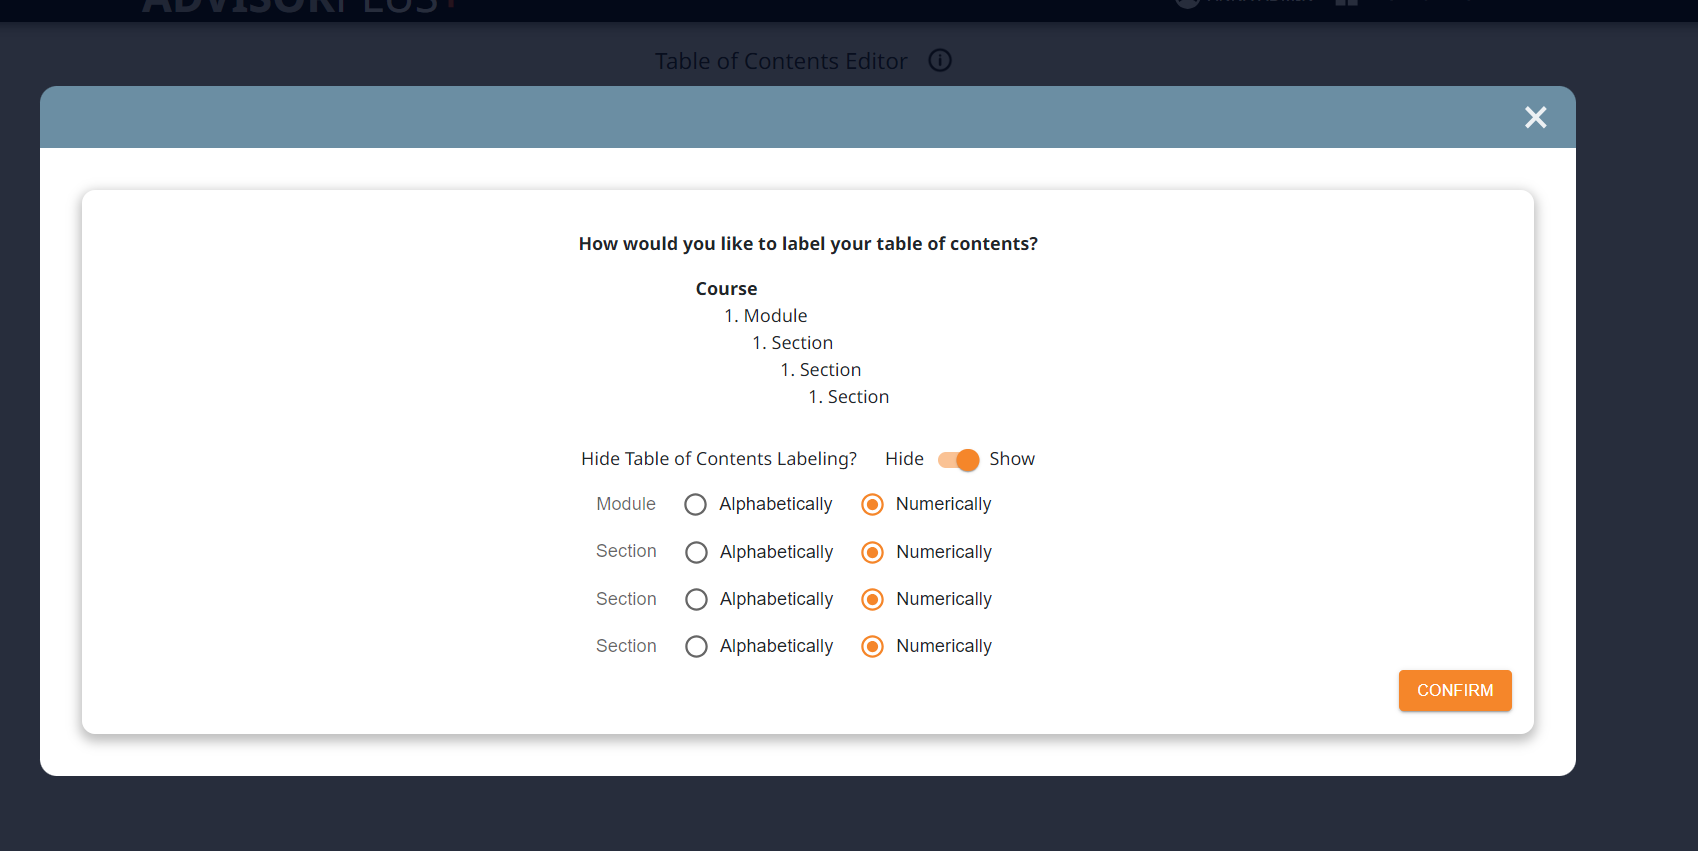
Label Sections
To change how your Table of Contents is labeled, click the Label button.
This will bring up a pop-up with sorting options. Choose to keep the default numbering, change to alphabetically, or select a mix of both. If preferred, you can disable automatic labeling to add your own. Once you’re done, click confirm.
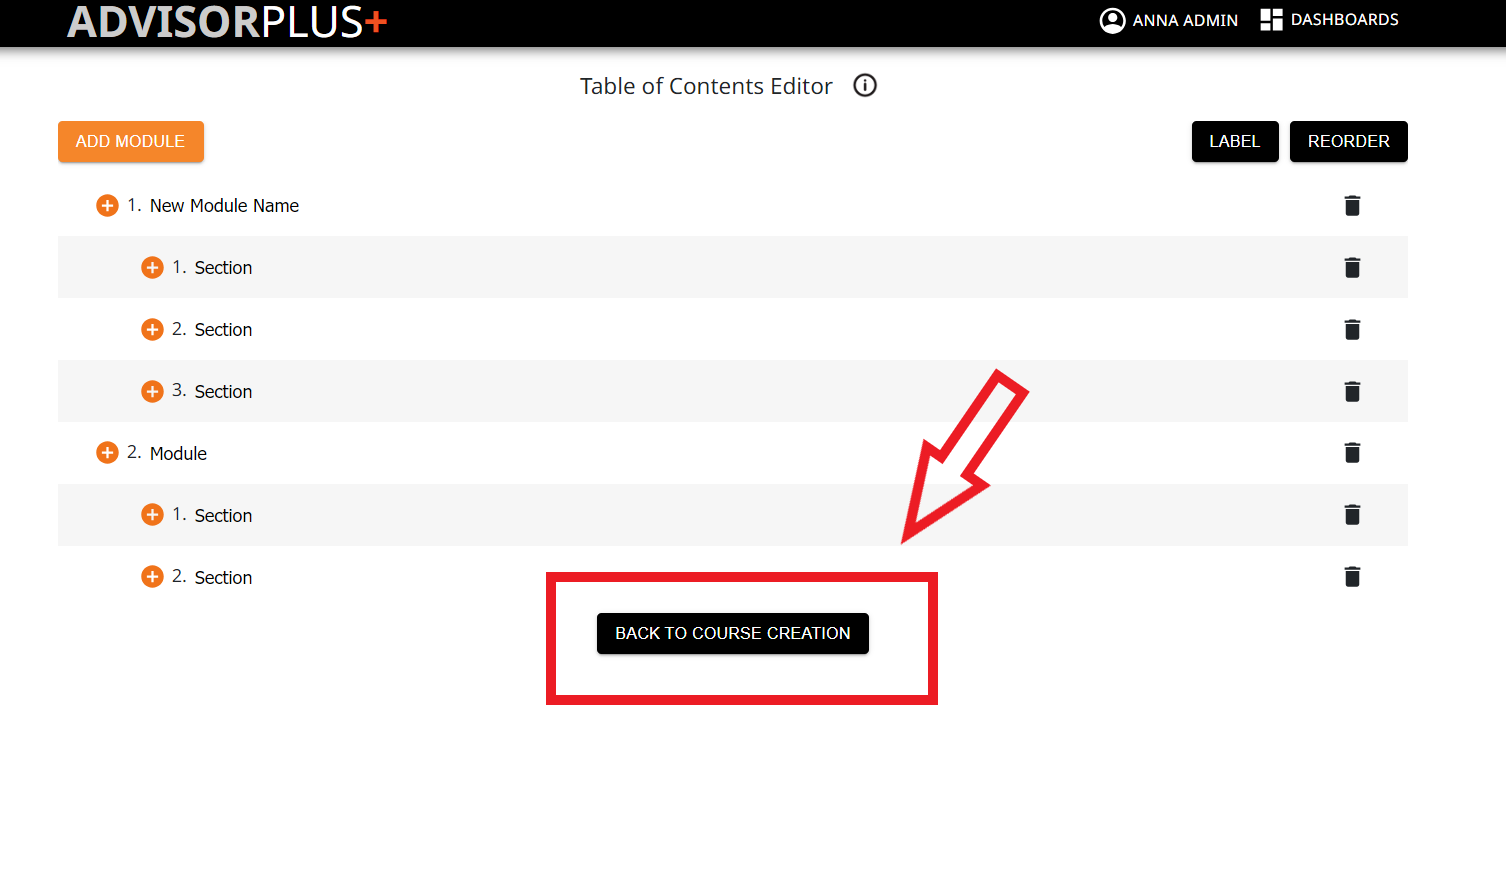
Confirm Edits
If everything looks good, click Back to Course Creation to begin adding content to your course. You can revisit the Table of Contents Editor at any time to make further changes to your course.
The Main Writing Screen is where you add content to the course. Customize text with the WYSIWYG bar or add images and video.
Once you’ve created your Table of Contents, you’ll see it displayed on the left pane. Bolded titles indicate topics, where you can add content. Select a topic to begin adding content.

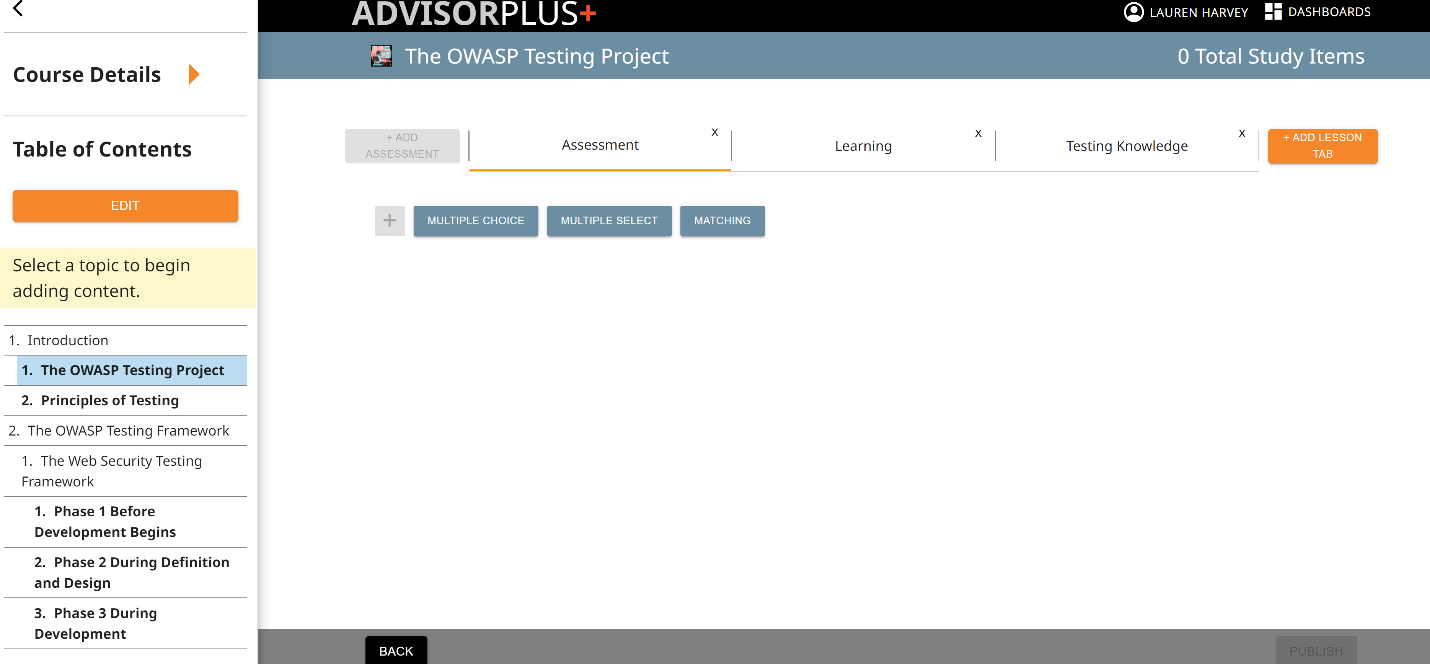
When a topic is selected, the Main Writing Screen will appear in the right pane. Content in a topic is organized into two types of activities: assessments and lessons.
Assessments
An assessment is a set of questions used to test learner comprehension of each topic. Assessments may only contain auto-graded study item types. This is limited to Multiple-Select, Multiple-Choice and Matching questions. Each topic may have, at most, one assessment. However, assessments are not required for each topic.
Lessons
Learners use lessons to study the concepts within each topic. Therefore, each lesson should teach all concepts within that topic. Information presentation may vary between lessons, and a lessons’ name can be indicative of its distinct teaching style. A topic may contain any number of lessons, but lessons are not required for each topic.
To understand lessons and assessments, it’s helpful to consider what the learner sees. Lessons and assessments help structure content for the learner to digest in Guide Me study mode.
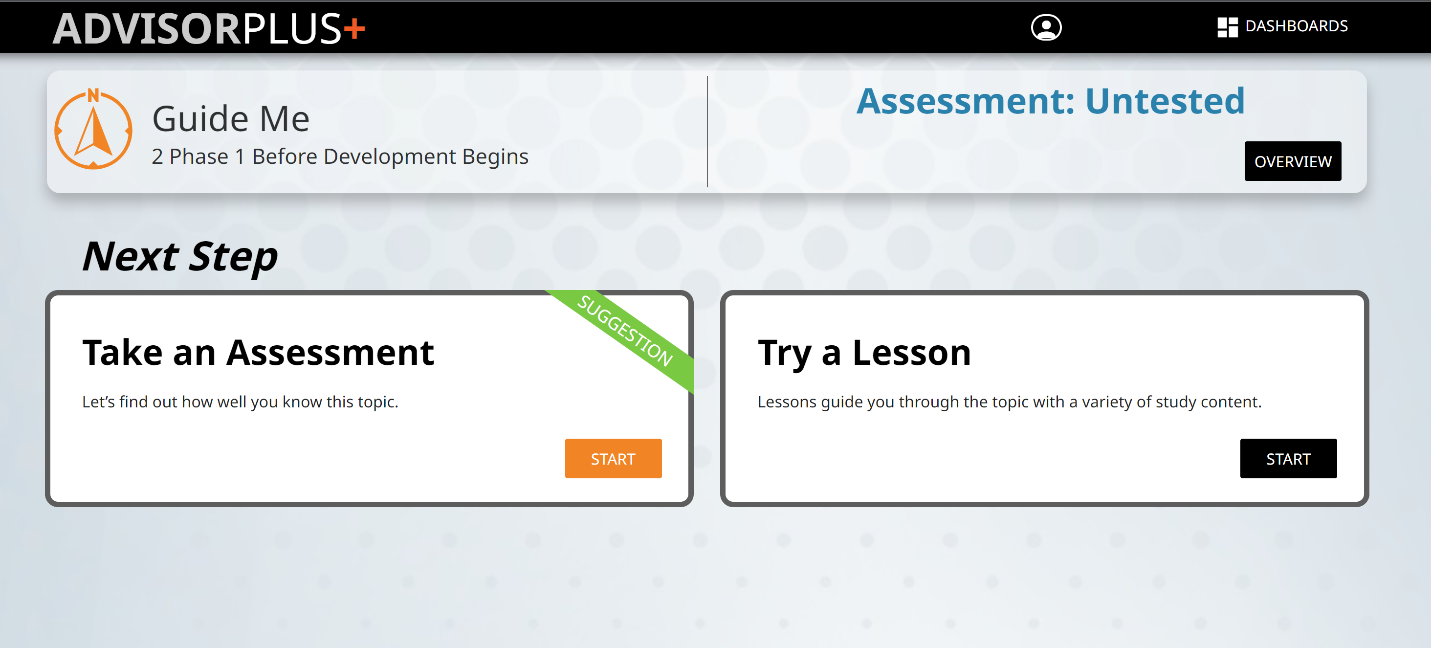
All of the content that you enter in lessons and assessments will also be available for self-guided study, divided into study item type (Non-graded [Knowledge Room], Self-graded [Check Yourself], and Auto-graded [It’s Your Choice and Test Me Now]). Therefore, content you enter once can be studied multiple ways by the learner, depending on their preferences, and the study mode options you choose upon publishing.

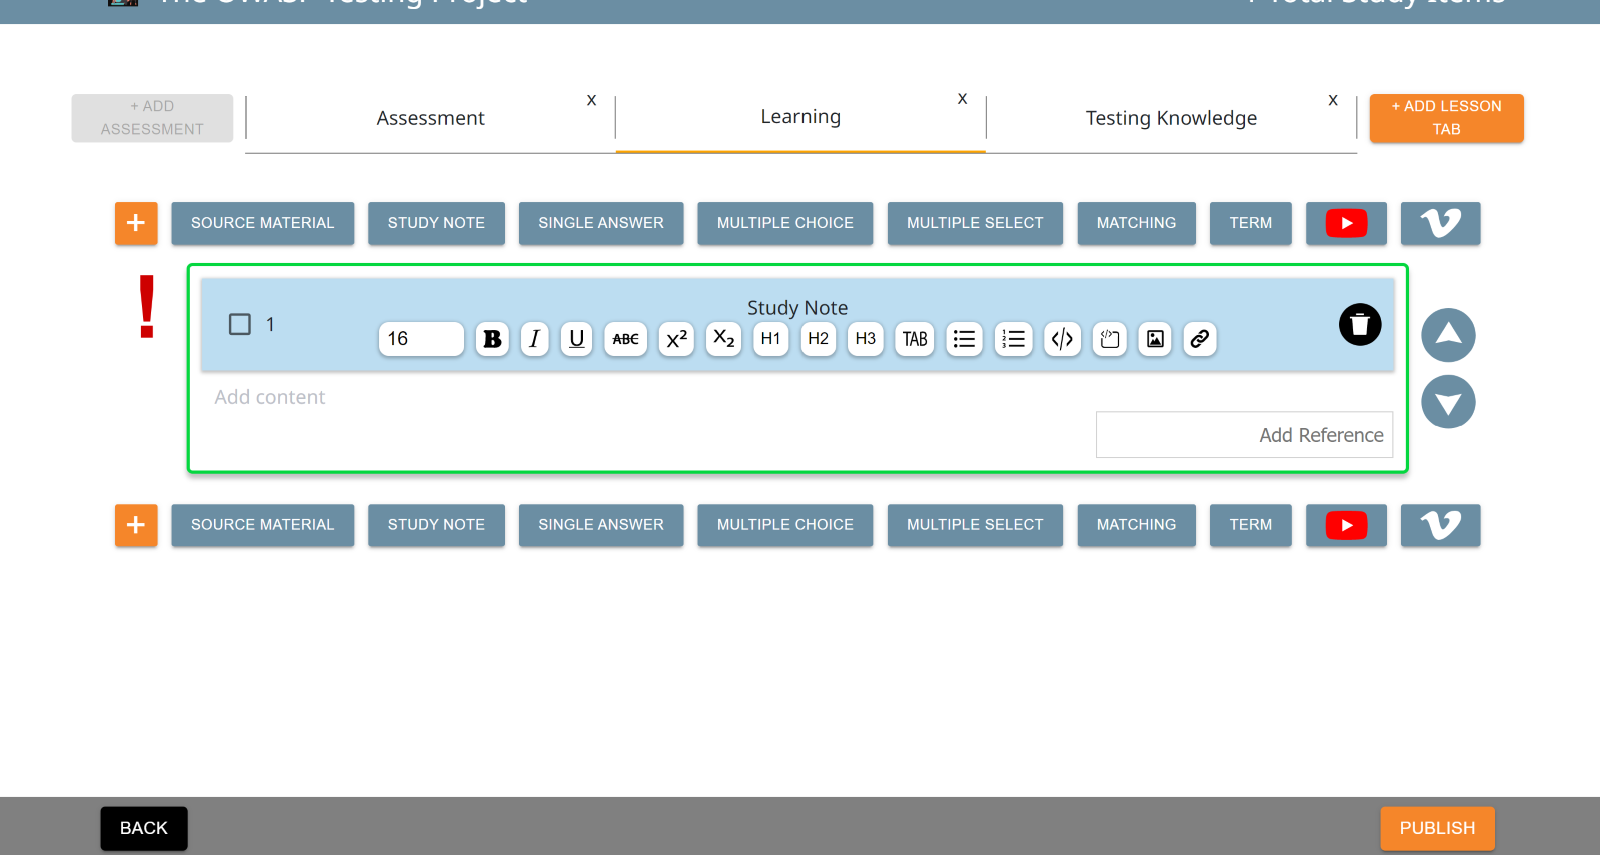
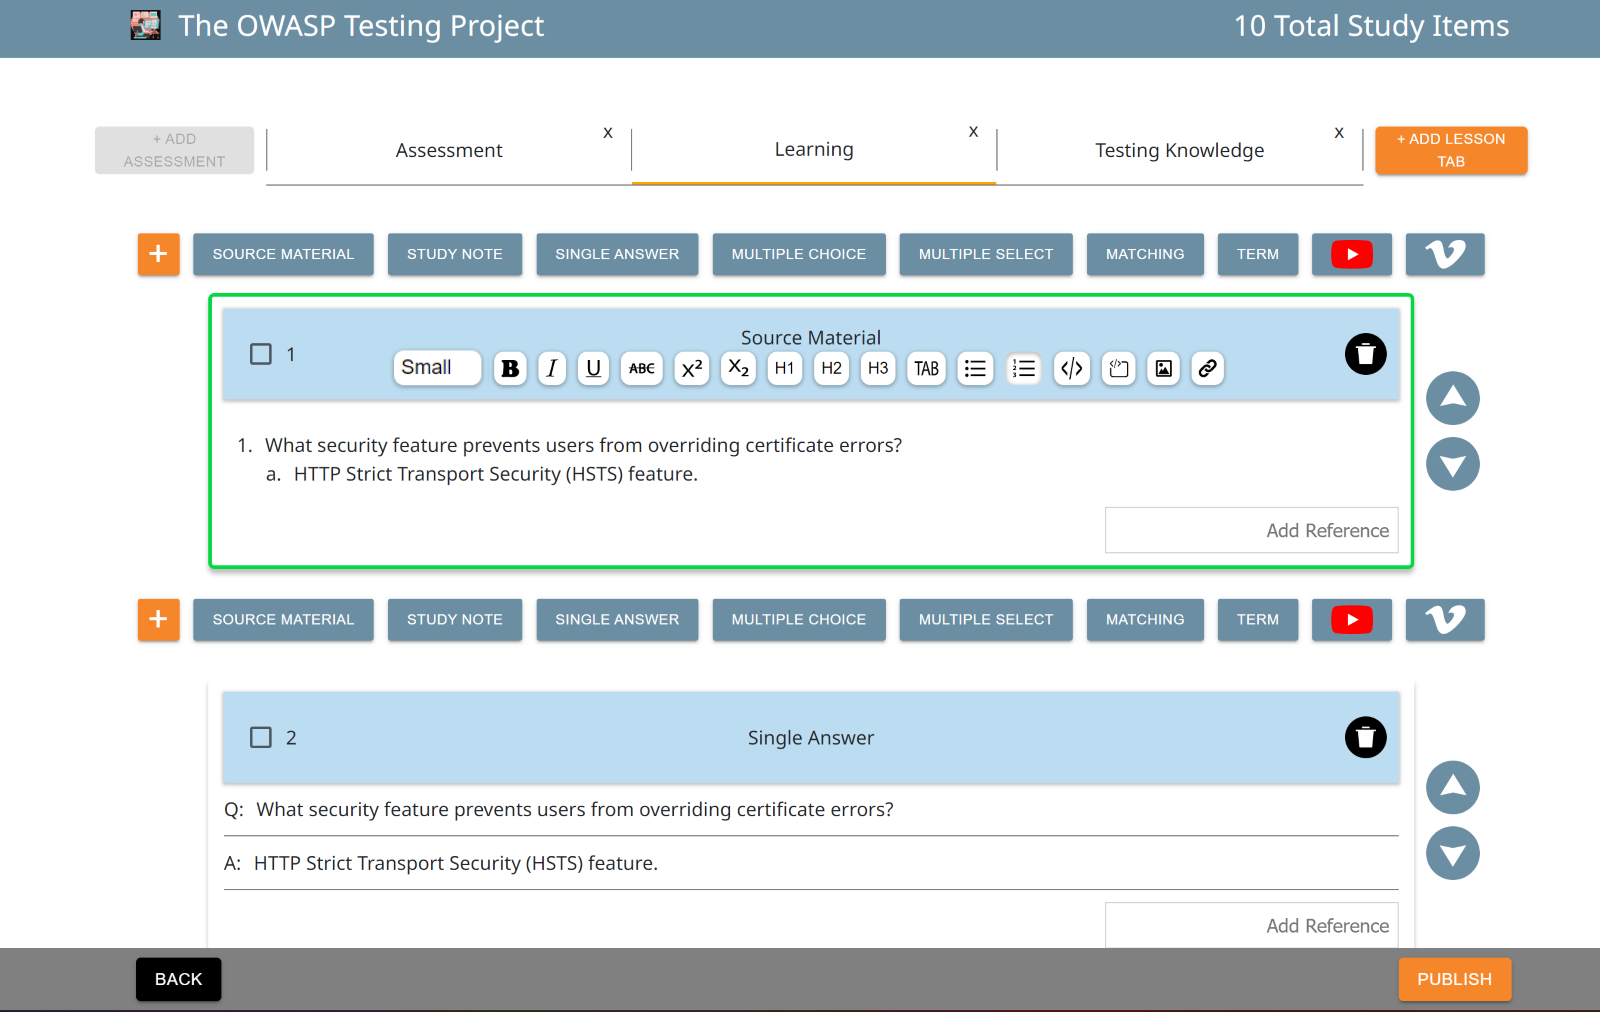
If you chose to add lessons to each new topic, you’ll see those lessons to the right of the Assessment tab. To delete a lesson tab, click the X. To add additional lesson tabs, click the Add Lesson Tab button. You can add or delete lessons from any section.
At least one assessment or one lesson is required for each topic.

To begin adding content, click one of the study item buttons. In the assessment tab, only auto-graded study item types are available. In lesson tabs, you can choose from all study item types.
Choose from the following study item types for lesson creation. Items with an asterisk can be used in assessments:
- Source Material
- Study Note
- Single-Answer
- Multiple-Choice*
- Multiple-Select*
- Matching*
- Term
- Vimeo Video
- YouTube Video
Source Material
The Source Material template contains a single text field. Use when directly including material from another source, such as a textbook, magazine, website, etc.
Source Material is a non-graded study item.

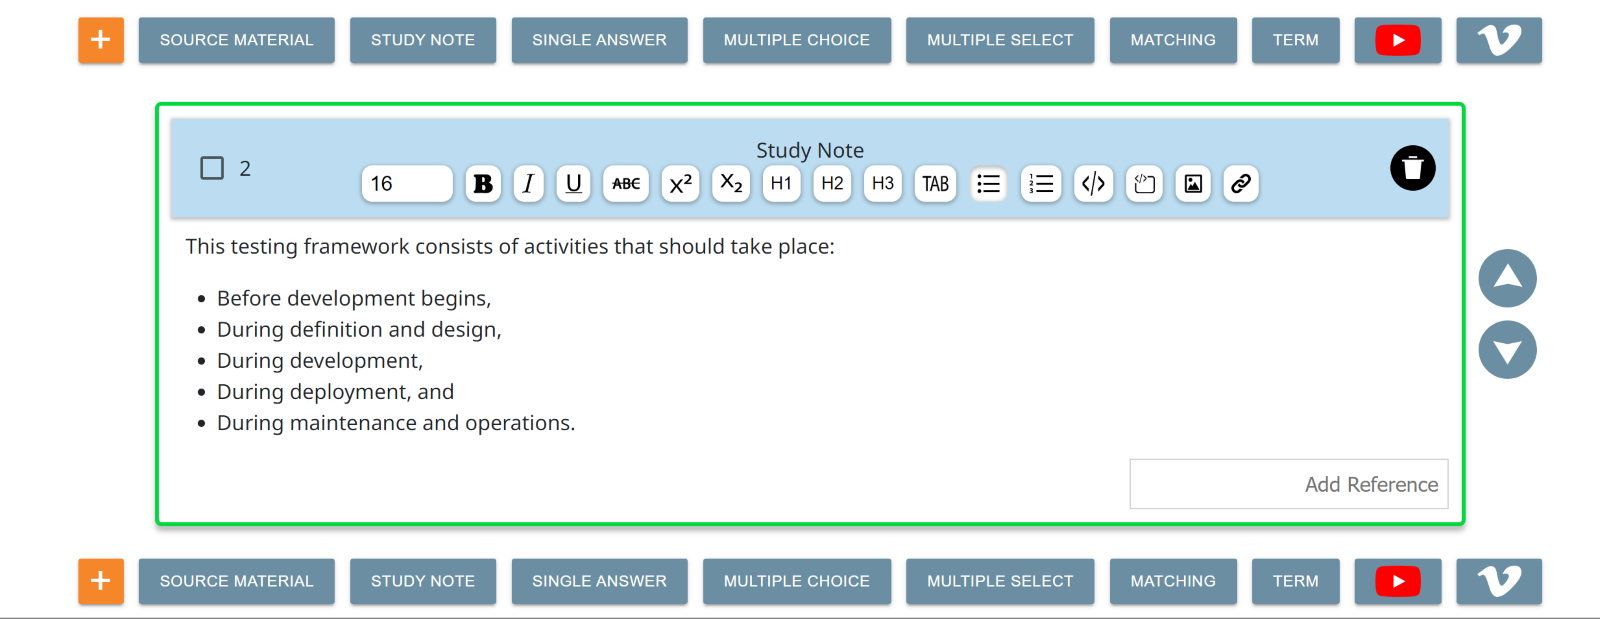
Study Note
The Study Note template contains a single text field like the Source Material template. Use a Study Note to summarize the contents of source material.
Study Notes are non-graded study items. Study Notes are presented to the learner in sequential order, meaning they can rely, or build, on each other.
Single-Answer
The Single-Answer template contains two text fields: one for a question, and another for the answer.
Single-Answer questions are self-graded study items which work well for flashcard-style studying. Single-Answer study items can be shuffled for the learner; therefore, it’s recommended each Single-Answer study item be able to stand alone, without relying on previous information for context.

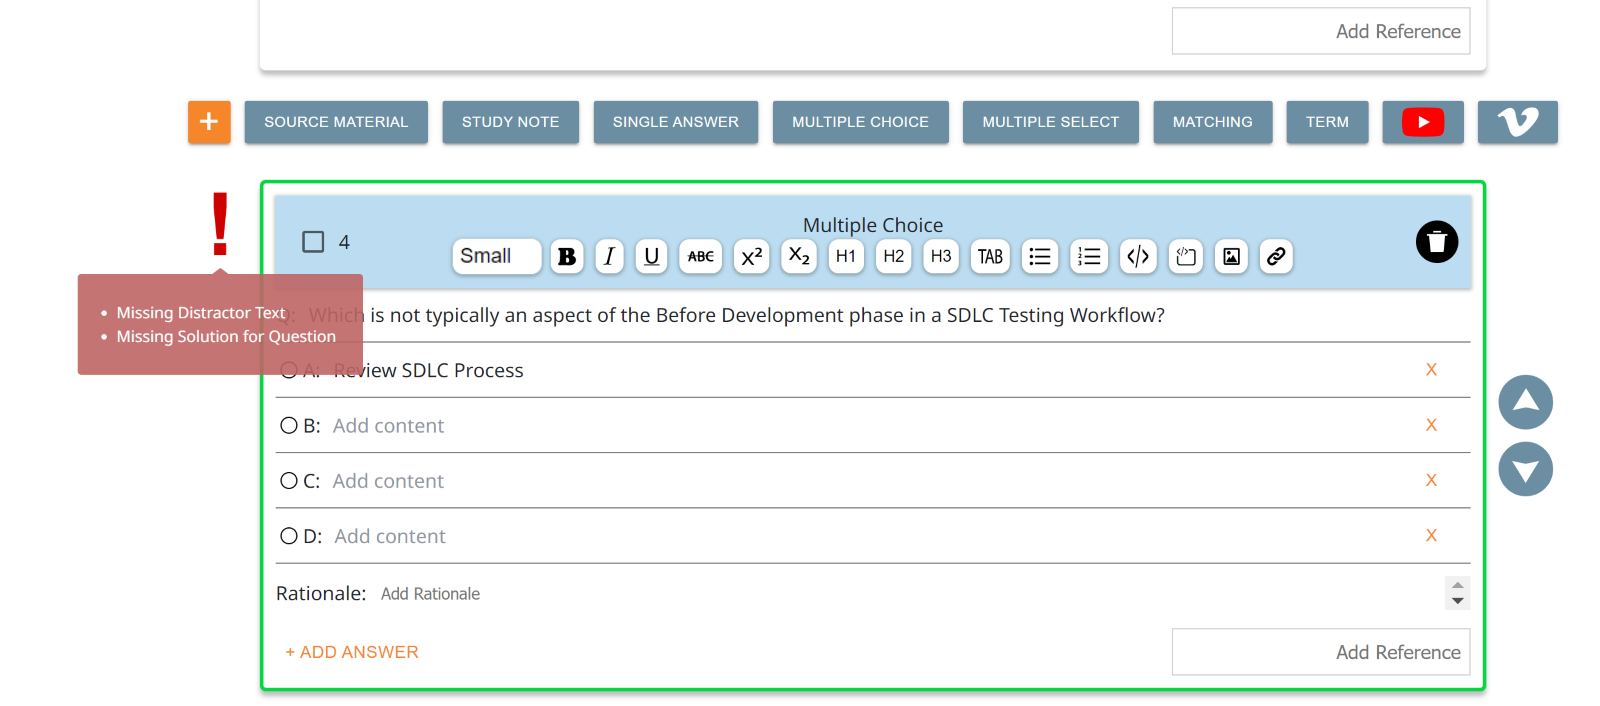
Multiple-Choice
The Multiple-Choice template contains a question text field and, by default, four answer text fields. Above the Add button is a rationale text field, to provide context for the selected answer. The rationale field is optional.
Use the radio button next to the correct answer to mark it as the solution. Use the Add button to add additional answer options, and the orange X on an answer to delete it. A minimum of two answer options must remain.
The learner will be given these instructions for Multiple-Choice study items: Select one answer.
Multiple-Choice questions are auto-graded study items that can be used for assessments or lessons. Multiple-Choice study items can be shuffled for the learner; therefore, it’s recommended each Mutiple-Choice study item be able to stand alone, without relying on previous information for context.
Multiple-Select
The Multiple-Select template contains a question text field and, by default, four answer text fields. Multiple-Select study items function similarly to Multiple-Choice, with the additional capability to select more than one correct answer. For a question to be answered correctly, all solutions must be selected.
Mark an answer field as a solution by clicking the checkbox. Once an answer field is selected as a correct solution, a rationale text field will appear beneath it. Rationales are optional and help provide context for the solution.
Delete an answer field by clicking the orange X on the right, and add additional answer fields with the Add button at the bottom of the study item box.
The learner will be given these instructions for Multiple-Select study items: Select all answers that apply.
Multiple-Select questions are auto-graded study items that can be used for assessments or lessons. Multiple-Select study items can be shuffled for the learner; therefore, it’s recommended each Multiple-Select study item be able to stand alone, without relying on previous information for context.

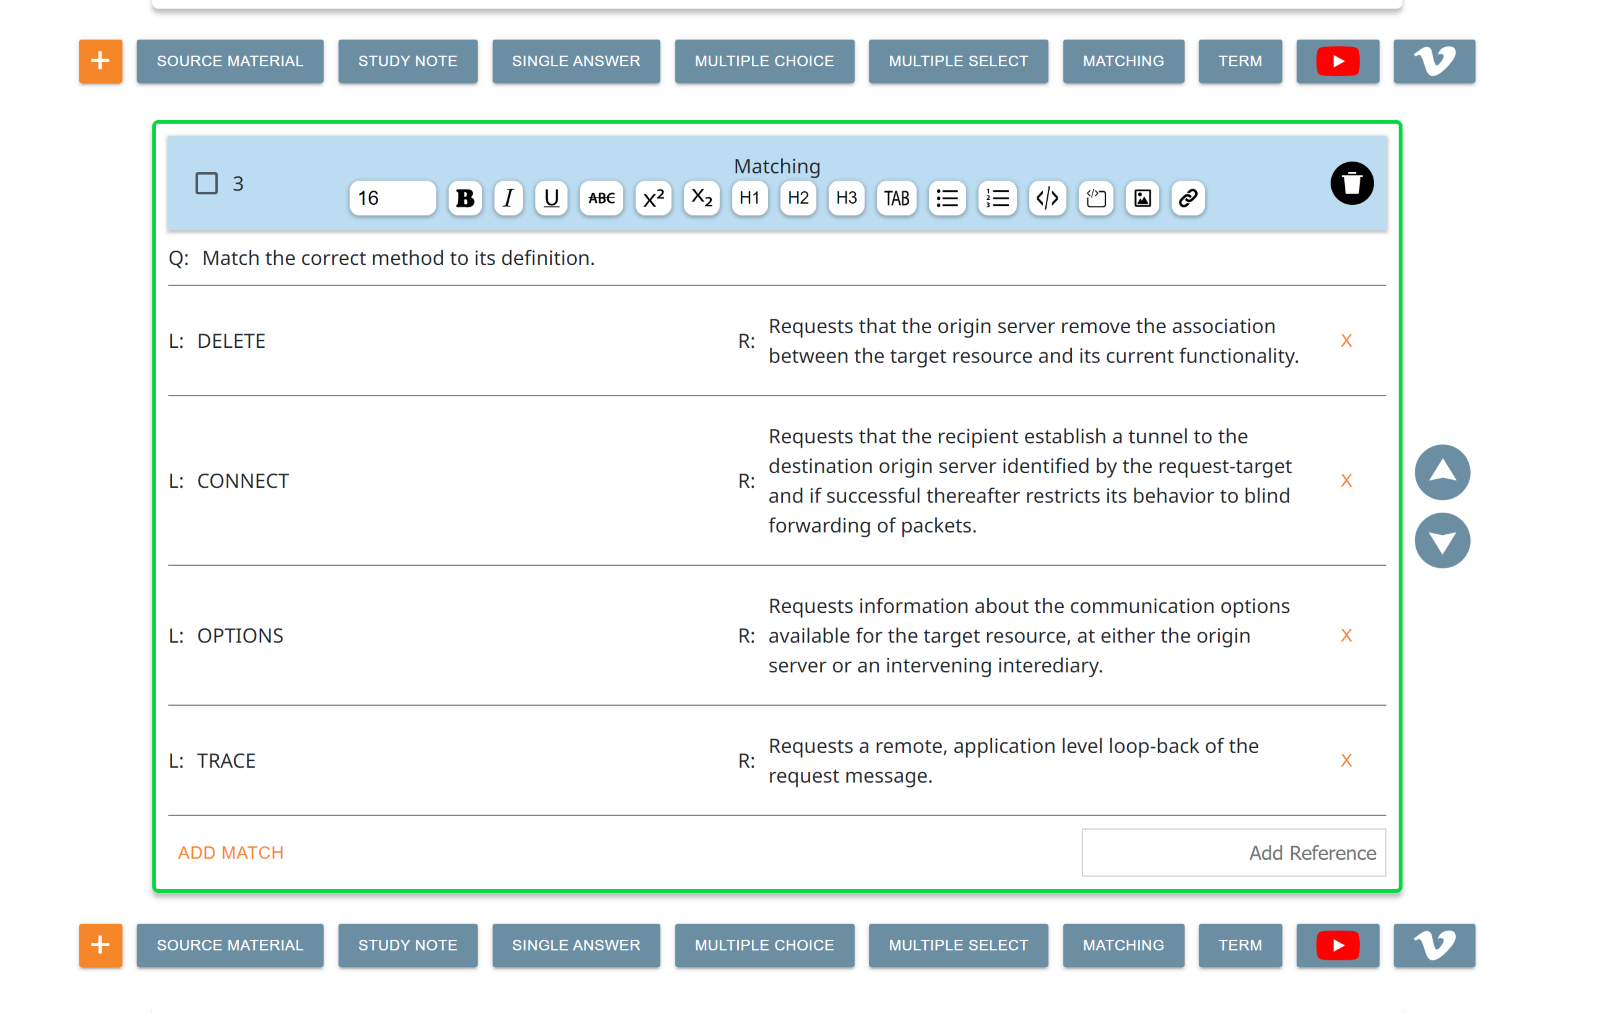
Matching
The Matching template includes an introductory text field to provide context to the learner. By default, two matching pairs will appear when the Matching study item is added. To add additional matching pairs, click the Add button. A maximum of eight matching pairs can be added to this study item.
Each matching pair contains two text fields. Input the correct answers side-by-side within the study item. Once the course is added to Advisor Plus, the items will automatically shuffle.
Delete a matching pair by clicking the orange X button on the right.
For a Matching study item to be considered correct, all items must be matched correctly.
Matching questions are auto-graded study items that can be used for assessments or lessons.
Term
The Term template contains one text field for the term and one or more text fields for the definitions.
Add a definition field by clicking the Add button in the bottom left corner of the template window. Delete a definition by clicking the grey X button in the field.
Terms are self-graded study items which work well for flashcard-style studying.

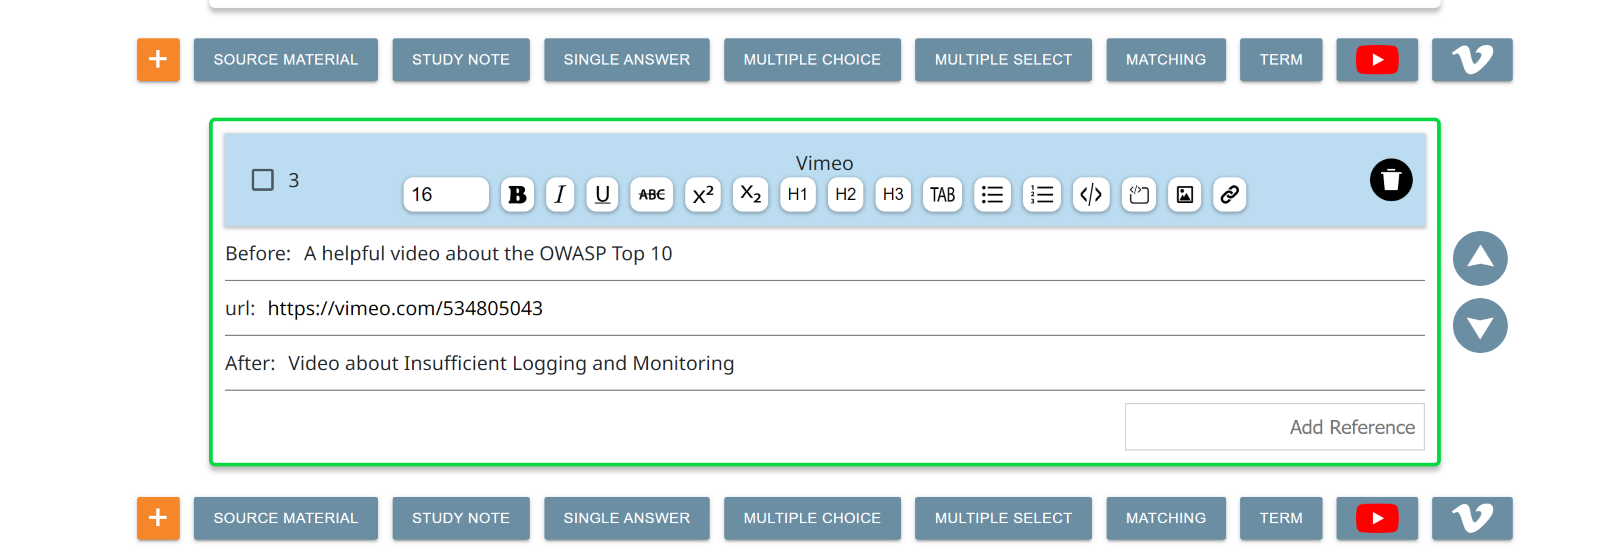
Vimeo Video
The Vimeo Video template contains three fields. Input the URL of the Vimeo video in the middle field labeled URL.
The top and bottom fields, labeled Before and After allow space to introduce the video, provide learners with context, or add thought-provoking questions to ponder before or after watching the video.
Videos are non-graded study items.
YouTube Video
The YouTube Video template contains three fields. Input the URL of the YouTube video in the middle field labeled URL.
The top and bottom fields, labeled Before and After allow space to introduce the video, provide learners with context, or add thought-provoking questions to ponder before or after watching the video.
Videos are non-graded study items.

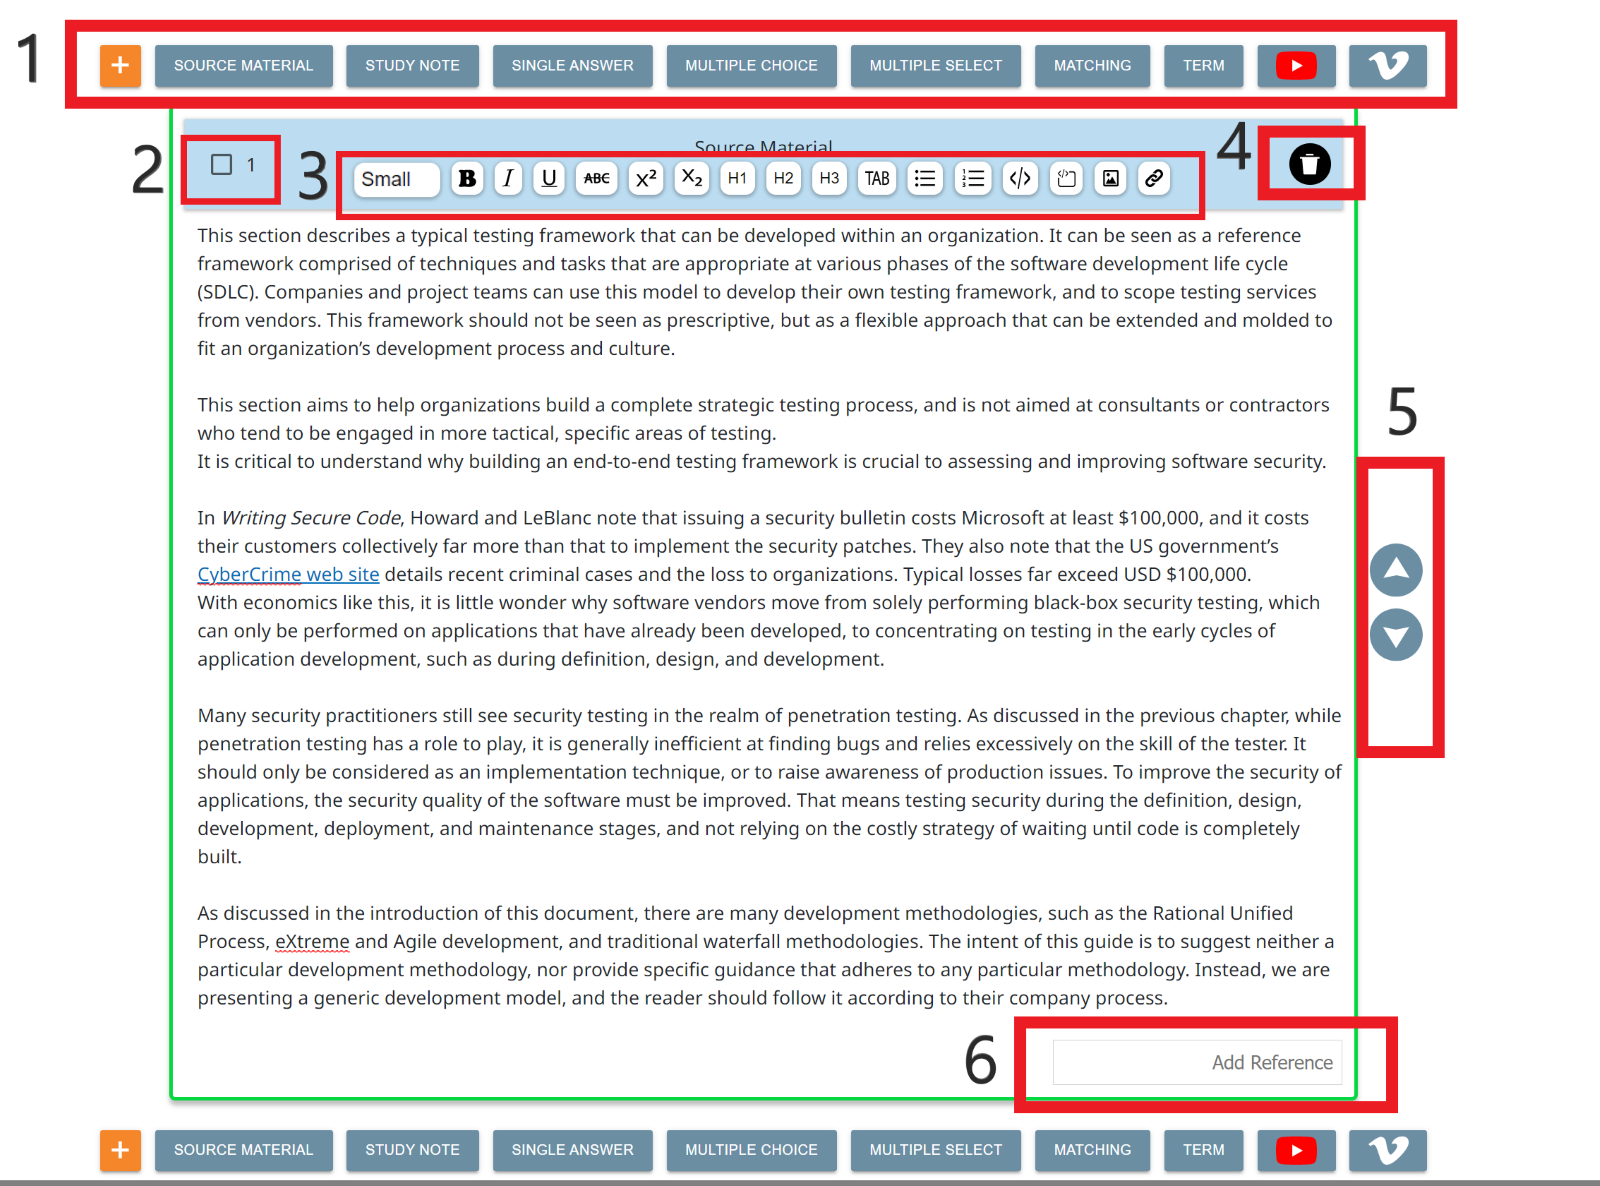
Once added, study items appear in a list in the Main Writing Screen. This is where you will spend the majority of time creating the course. This screen is designed to allow the course author to maintain hands on the keyboard as much as possible to increase efficiency and provide optimal workflow.
All study item types share the following elements:
- Add study item bar appears above and below currently selected study item. Click the orange plus button to add another of the same study item type, or choose a new study item type. Add above or below the current selected study item.
- Select one or multiple study items for bulk edits such as cut, copy or delete. See below for more information on bulk edits.
- WYSIWYG menu for study item formatting. See below for information on WYSIWYG functionality.
- Trash can icon deletes individual study items. Please be advised, once you delete a study item, you cannot restore it. You will receive a confirmation pop-up before deleting study items.
- Use the arrows along the right side of the study item to change the study item’s position within the topic.
- Add a reference, such as the section the material can be found in your source material.
On the left side, a red exclamation point will appear when the study item fields are incomplete or invalid in some way. To view the specific error, hover over the exclamation point. Once you correct the listed errors, the exclamation point will disappear.
You can resolve these errors immediately while writing, or all together at the end of your writing session. You are also free to leave the session with errors unresolved, as they will persist. Errors must be resolved before course publishing.
Tabbing Feature
Authoring+ includes a tabbing feature created to maintain flow while writing. Using the tab key, authors can navigate through adding new study items, adding text in the study item, answers and more. To utilize the tab feature, simply press Tab on your keyboard to move around the Main Writing screen.
Cut/Copy Study Items
To cut or copy study items, click the checkbox icon on one (or more) study items. Study items will be cut/copied and pasted in the order in which you check them.

Click the appropriate icon to cut or copy. If you’d like to delete, click the trash can icon.
Move to the topic, and/or appropriate tab you where you’d like to add the content.
Click paste in the correct location – all selected content will be dropped into the location, if it is allowed.

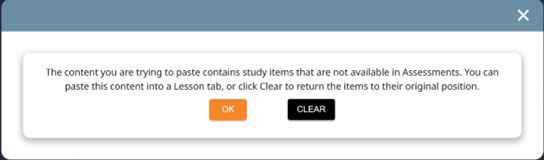
If you attempt to move non-autograded material into an Assessment you will receive a warning pop up.
The action bar of the Main Writing Screen provides two helpful actions:
- Back – Opens a pop-up to take you back to the dashboard or check the course in.
- Publish – Launches the publish wizard.
Clicking Back will bring up the pop-up with two options:
- Return to Dashboard – Takes you back to the main Authoring Dashboard. This course will remain checked out to you.
- Check In – Check the course in and return to the Authoring Dashboard. This will allow another user to check the course out to make changes.

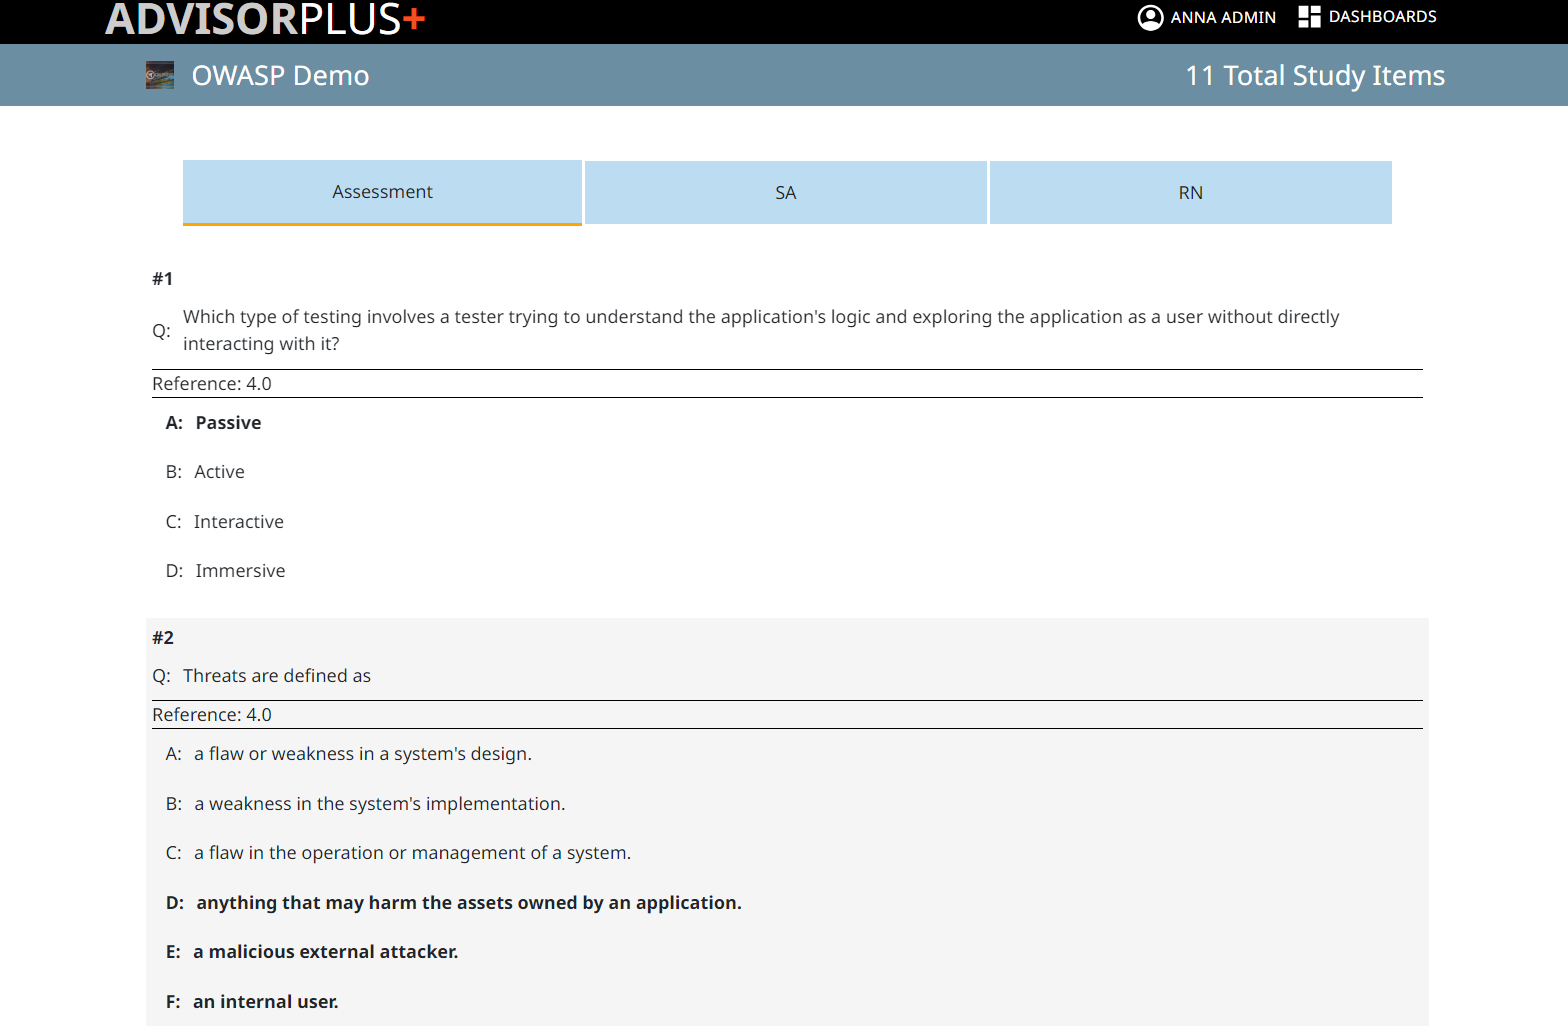
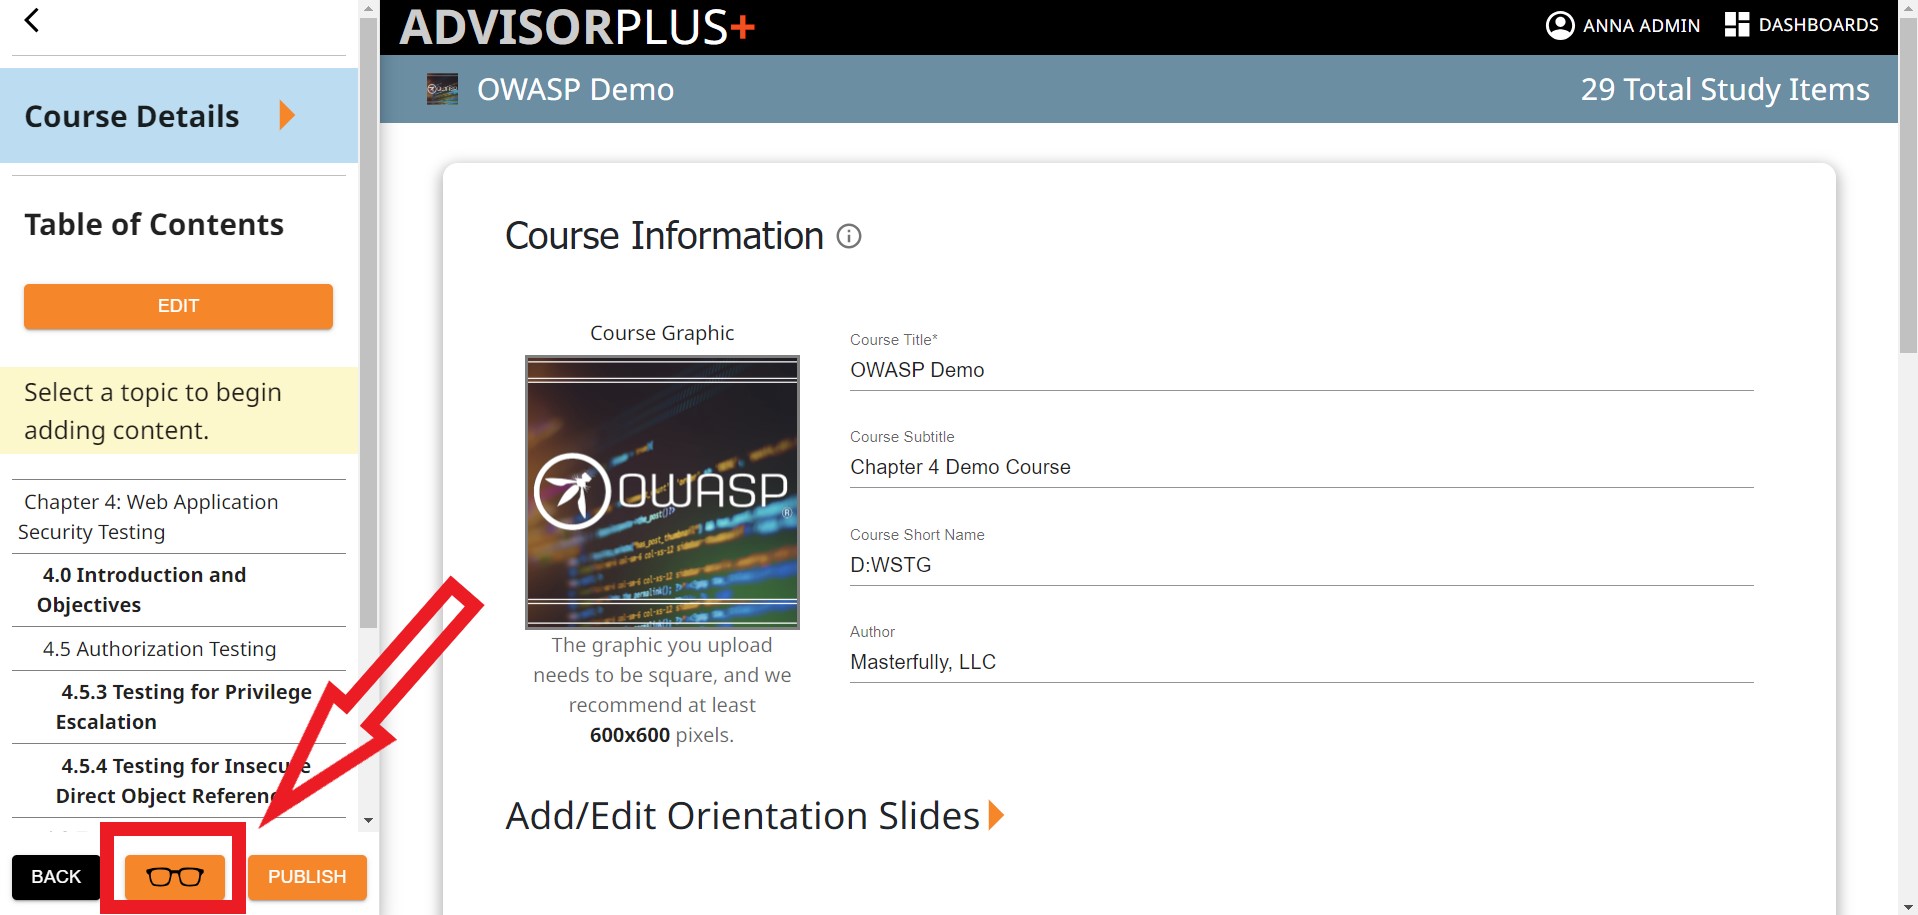
The Preview Course feature allows authors to view what the course will look like in Advisor Plus without publishing. You can enter Preview mode at any time during the course creation process. It is particularly useful if you have images, code blocks, videos or other media assets in your course. To activate preview mode, click the glasses icon between the Back and Publish button in the Table of Contents sidebar. The course preview will open in a new tab. If you do not see a new tab open, check your browser’s pop-up settings.
Preview mode is only accessible to authors in Authoring+. You’ll see all of the content within the course displayed as the learner will see it in Advisor Plus with a few key differences. In Preview, only practice study modes will be available (Knowledge Room, Check Yourself and It’s Your Choice). Additionally, since this is only a preview, all the study items will be presented in an already answered state, meaning you won’t be ‘learning’ the course, only viewing existing study items.
To exit preview mode, simply close the tab in your browser.
The WYSIWYG study item editor appears within the selected study item. It provides formatting tools, including standard changes like bold and underline, as well as more customized functionality, like adding code sample blocks and hyperlinks with display text. To easily see what a specific WYSIWYG button does, simply hover over the button.

- Font size – change font size with drop down menu
- Bold the text
- Italicize the text
- Underline the text
- Add strikethrough to the text
- Superscript2 selected text
- Subscript2 selected text
- Indents the text
- Adds bulleted list
- Adds numbered list
- Formats text as code sample line
- Formats text as code sample block
- Add an image from file
- Add hyperlink with optional display text
Easily publish your course with our Publish Wizard. With built-in error check, you don’t have to worry about publishing a course with a blank question or missing answers.
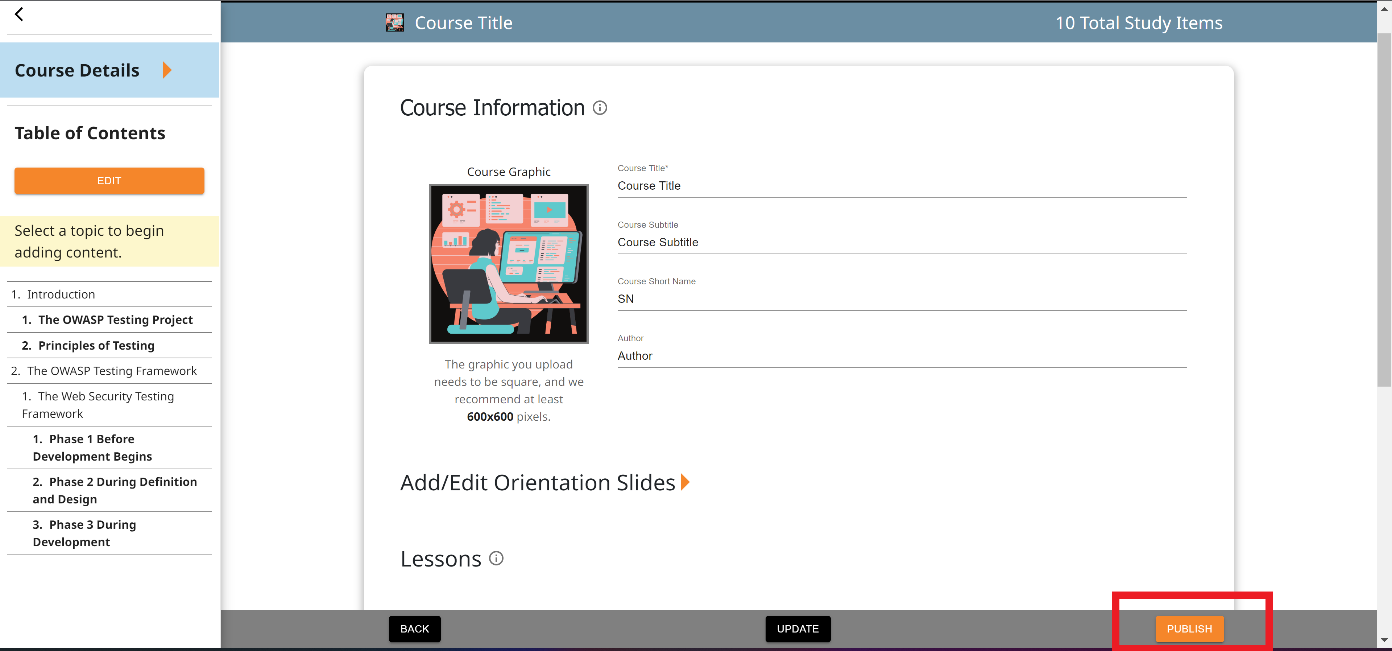
Once you’re done creating your course, it’s time to publish! Click Publish from the Course Details screen or from within any of the topics to start the Publish Wizard.
Publishing a course from Authoring+ makes the course available in Admin+. From there, administrators can import the course and enroll learners.
The first publishing screen provides information about the publishing process, including the aspects of the course that can and cannot be changed after publishing.

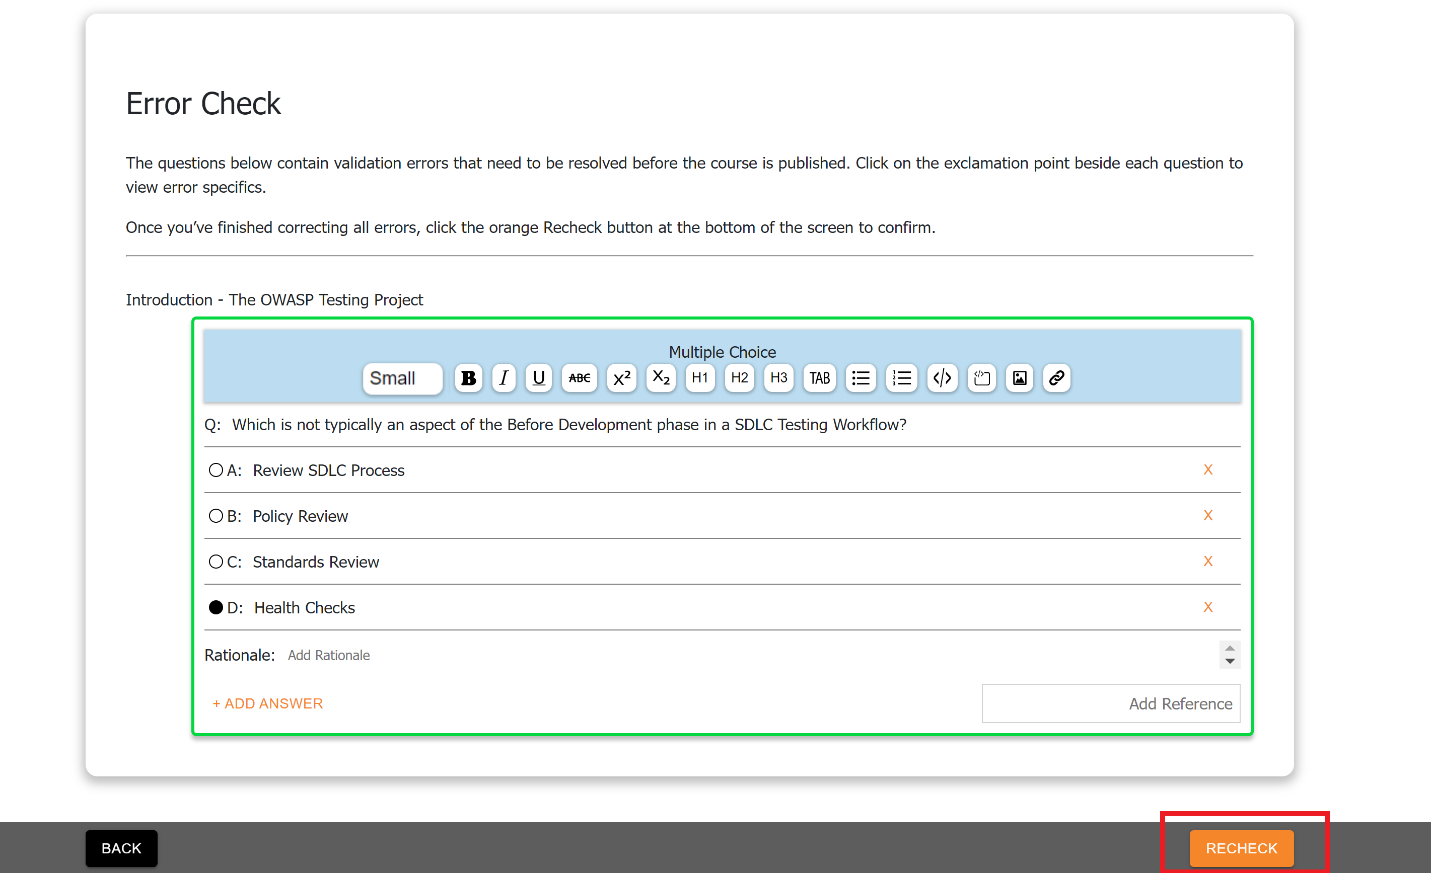
The error check will present all study items with validation errors. This eliminates errors so no course is published with missing information.
Study items with validation errors will appear in the dialog window. You can make adjustments to study items directly within the Publish Wizard.
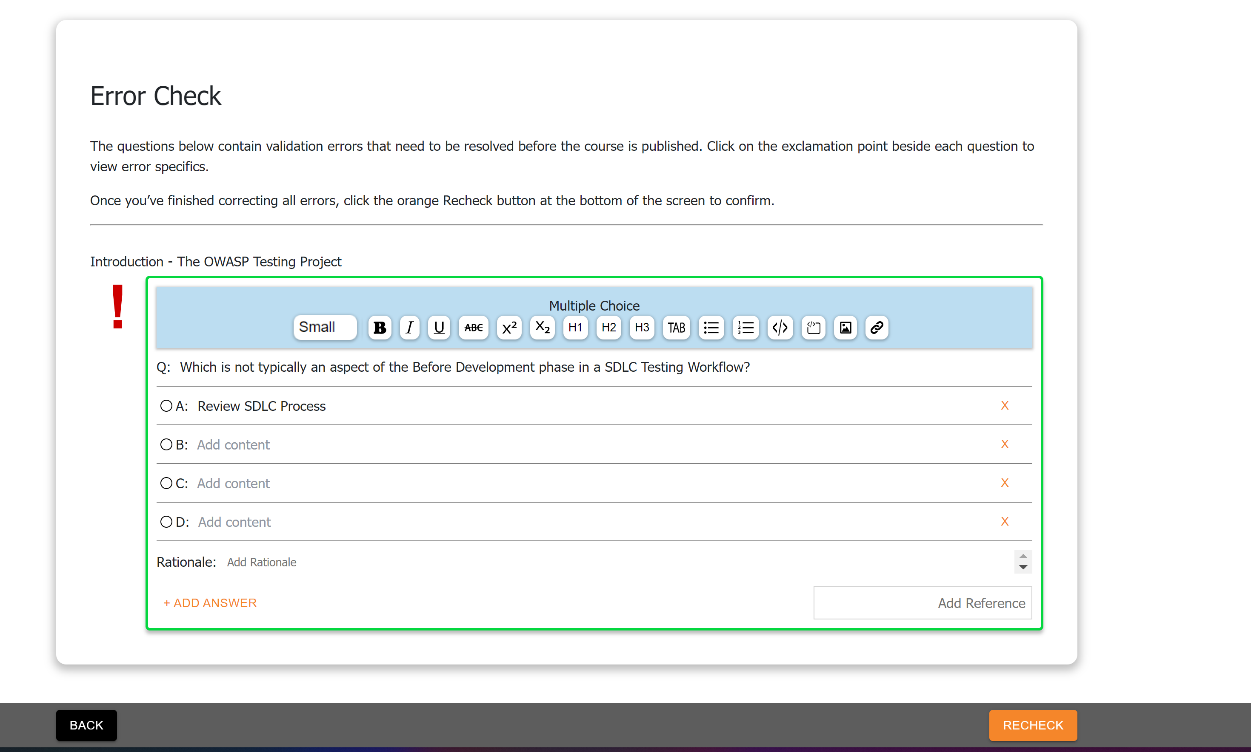
Once you make corrections to the necessary study items, click Recheck on the right side of the action bar.
If all validation errors are resolved, you’ll receive a success message. Press Next on the action bar to continue publishing.

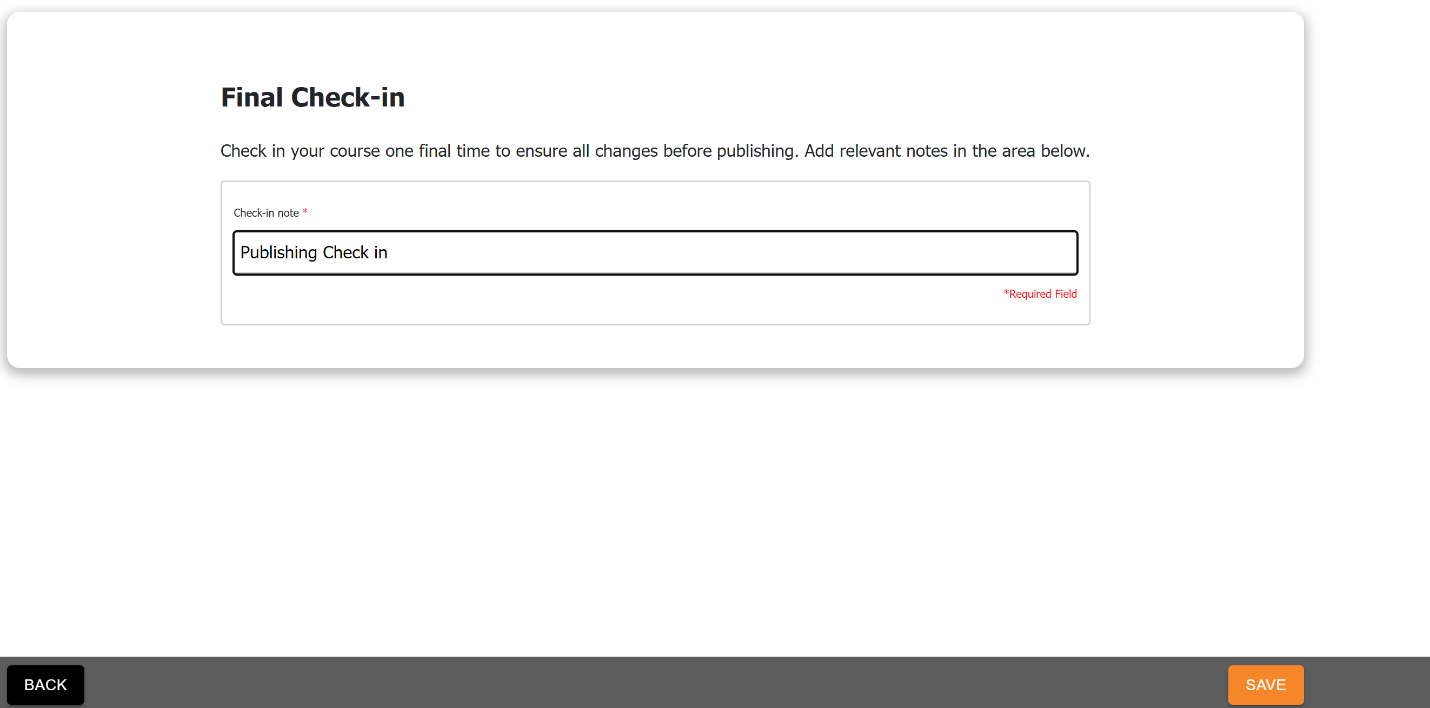
Check in your course to save changes before publishing. A check-in note is required any time you check a course in. Check-in notes are designed for a brief note about changes made during the time the course was checked out to you. Check-in notes are visible in the Activity Log for each course within the Course Catalog.
When you are done adding a note, click save to proceed with publishing.
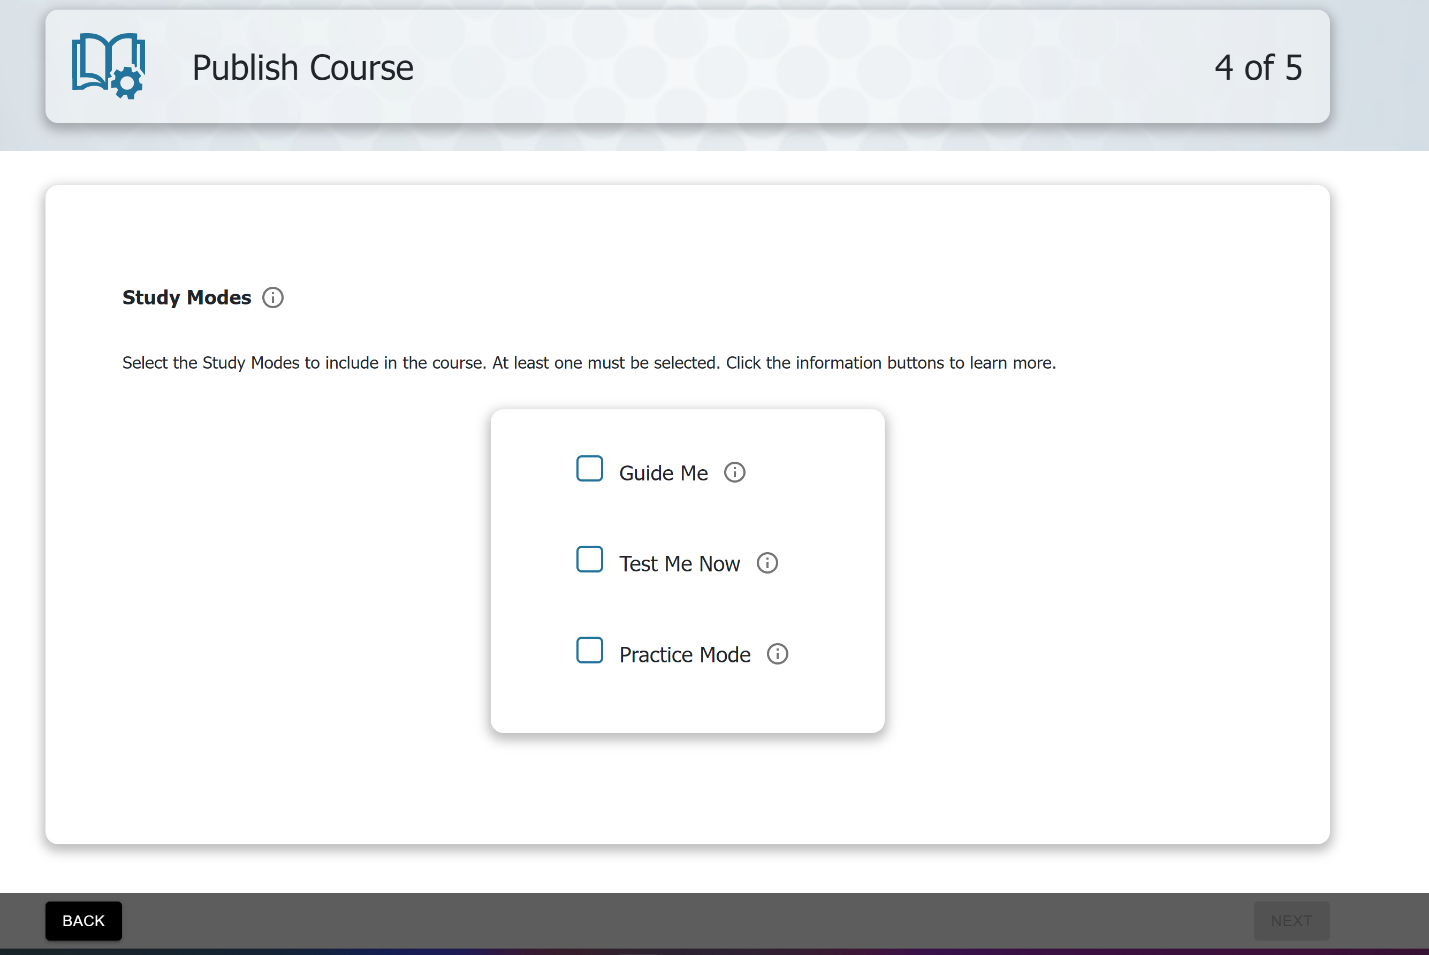
Once you’ve checked in your course, it’s time to select study modes. The Study Mode screen is where you’ll select which study modes to utilize in the course. Choose from the following study modes:
- Guide Me – Guided learning
- Test Me Now – Practice tests
- Practice Modes – Self-guided learning that includes three practice modes
Guide Me
Guide Me takes learners through the course in bite-size pieces. Guide Me works best with courses that have both lessons and assessments for each topic, but can be utilized just with lessons or assessments.

Test Me Now
Practice tests provide a perfect way to gauge learner’s mastery of the course. Since the questions are pulled randomly from the entire course, the results will give learner’s a good idea as to how much they understand the course content overall. Learners can skip questions if desired. Test Me Now provides peer statistics and progress tracking. In the Test Me Now area, learners can hover over any point on the test graph to see more information about their results. Learners can choose to retake practice exams in Test Me Now as often as they would like.

Practice Modes
The following practice modes are available for self-guided learning:
- Knowledge Room – Non-graded informational material including source material, study notes and videos.
- Check Yourself – Self-graded questions in a flashcard style format.
- It’s Your Choice – Auto-graded custom quizzes, built from areas of the course selected by the learner.

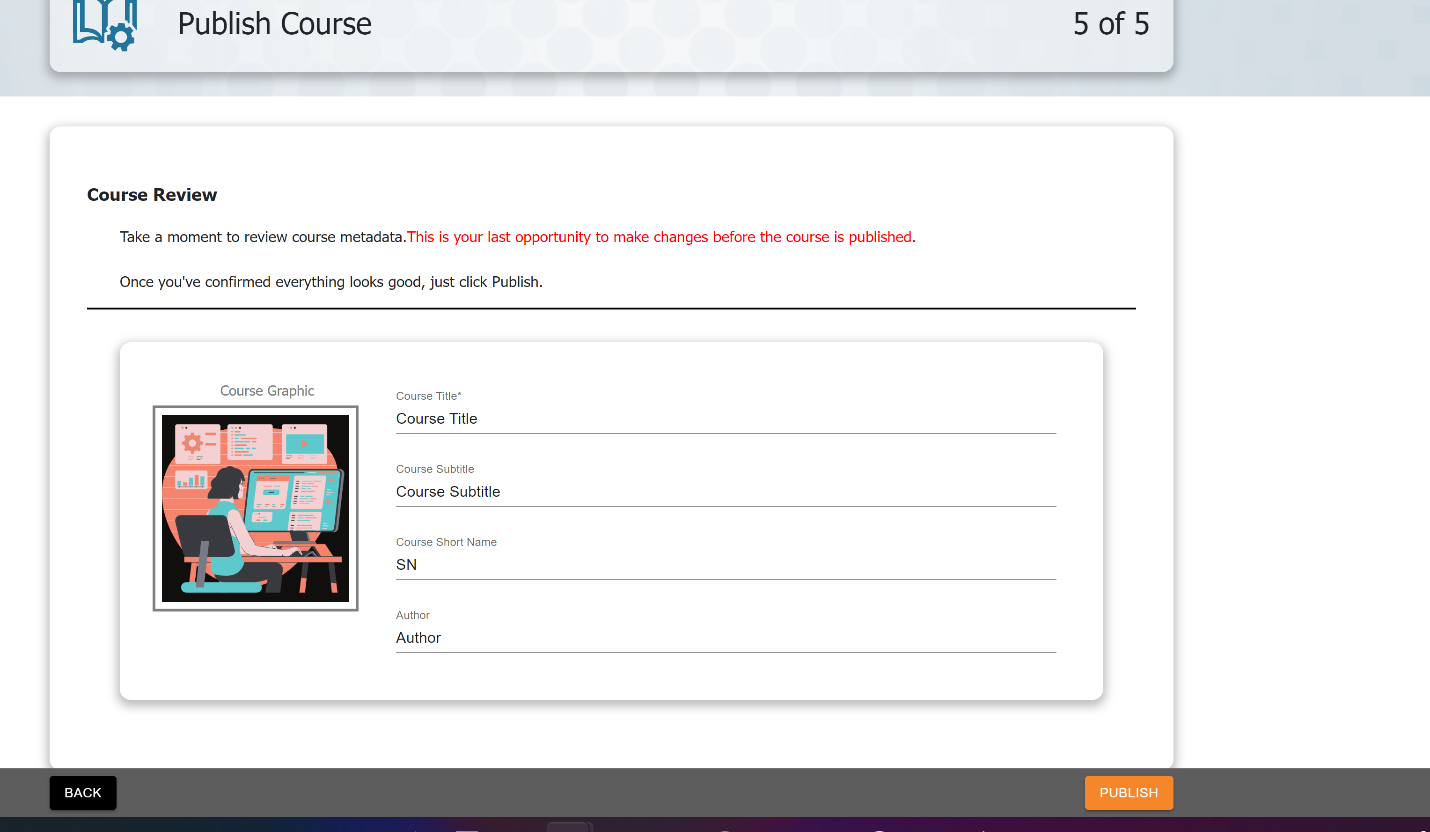
Course Review
Review course metadata before publishing. If everything looks good, click Publish to finish publishing your course.
Find FAQs or contact us to have all your questions answered.
Click on your name at the top header of Authoring Plus to access the Help Center at any time.